
The initial setup of the Company Setup form will begin the process of setting up the look and feel of the Estimates as the customer will see them. Many of the options and fields in this form will directly shape the look of the Estimate given to a customer. The Company Info, Options, Comments and Letterhead Tabs will need to be addressed before moving on to the next step in the setup process. Directions to complete each step of the setup process can be found on this page. Please scroll down and locate the section where you have a question.
Once complete, you can move on to the Initial Setup of the Manufacturers Form, by clicking here.
Working with the Company Setup Form
Entering Company Information
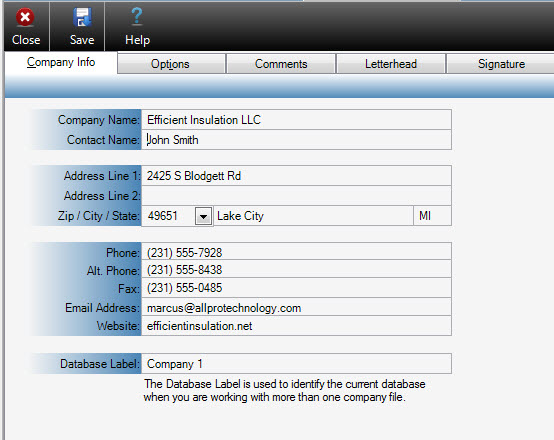
The first tab on the Company Setup form is the Company Information tab. This is where you enter your company information. This information may be displayed on some of the printed reports from within Allpro Insulator.
Setting Program Options
1. Price Style
Allpro Insulator supports Discount and Markup estimate pricing styles. The Discount style allows you to specify a base sales price for each item that you will charge your customers. You can apply a discount or markup percent for each customer and/or each estimate to reduce or change the price charged. The Markup style allows you to bring in the total cost for each item and then specify a markup percent for each customer and/or estimate. It is important to understand that when using the Markup price style, you are bringing in the Total Cost of the item when estimating and the ability exists to send an Estimate to the customer with items that are being sold at cost. Care must be taken to ensure that sales reps and users understand how to prepare Estimates and what Markups will need to be applied. Steps can be taken to limit these instances from occurring.
When you create a new estimate, the default price style you enter here will automatically be selected on the estimate. If you want to change the price style for a particular estimate, you have the option to change it directly on the Estimate form.

2. Zipcode Filter
Allpro Insulator contains a list of over 49,000 zip codes. These zip codes are used to automatically fill in the City and State fields based on the zip code you enter. For example, if you type 49651 in the Zip Code field on the Customers form, the City field will be set to Lake City and the State field will be set to MI. While this is a very useful feature, it does take some time to load all 49,000 + zip codes on the form. Most of your customers are likely located in one state. By entering your state in the Zip Code Filter field, only zip codes from your state will be loaded onto the Customer form. This will greatly increase the performance. If more than 1 zip code is needed for any given user, a User Preference exists that will allow for up to 5 zip codes for selection.
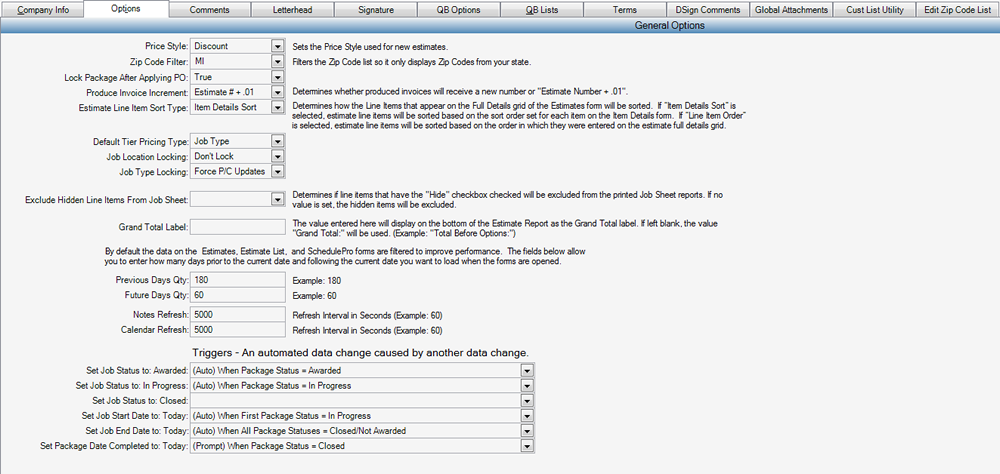
3. Lock Package After Applying PO
This feature determines whether the Packages on the Estimates Form will automatically become locked after a PO Amount is applied.
4. Produce Invoice Increment
This feature determines how the Estimate/Invoice number will be displayed when an Invoice is produced. You can either have it use the next Estimate number in the Estimate # range or add .01 to the end of the Estimate #. This makes it easier to keep track of all the different invoices you bill for different phases of the bid. This is also handy when creating revisions to your estimates.
5. Estimate Line Item Sort Type
This feature determines whether or not the line items that are entered on the Estimates Form will maintain the sort as they are entered on the Estimate or they will utilize the pre-determined sort of the Item Details Form.
6. Default Tier Pricing Type
The Default Tier Pricing Type allows users to select the Default tier grouping that will be used within Allpro Insulator while taking advantage of the Tiered Pricing feature as part of the Advanced Features Module.
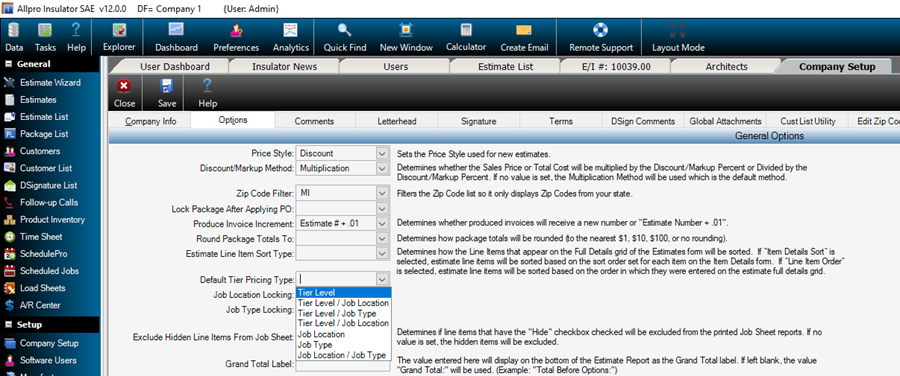
7. Job Location Locking
The Job Location locking selection allows users to determine whether the tiered pricing selection based on the Job Location will occur automatically or need to be manually selected and whether a prompting will occur.
8. Job Type Locking
The Job Type locking selection allows users to determine whether the tiered pricing selection based on the Job Type will occur automatically or need to be manually selected and whether a prompting will occur.
9. Exclude Hidden Line Items from Job Sheet
This allows users of Allpro Insulator to automatically choose to have all hidden line items excluded or included on the Job Sheets by default. This allows this selection to be automatically chosen and removes the need to select the option on the Estimates Form each time a Job Sheet is printed.
10. Default Date Ranges
By default all the data on the Estimates, Estimate List, and SchedulePro forms are filtered to improve performance. Only records that fall between the default date range will be loaded into the forms when they are first opened. You can change this date range on each of the forms as well as select to display all records. The date range feature will greatly improve the performance of the software by not loading older unneeded records. The date range is based on a preset quantity of days prior to the current date and a preset quantity of days following current date. In the Previous Days Qty field enter the quantity of days prior to the current date you would like to display. For example, if today’s date is 02/10/2010 and you enter 60 in the Previous Days Qty field then all estimates and appointments after 12/12/2009 will be loaded when the forms are opened because 12/12/2009 is exactly 60 days before 02/10/2010. The Previous Days Qty is used to enter the quantity of days after the current date you would like to include by default. The Future Days Qty field is primarily used on the SchedulePro calendar to include upcoming appointments.
11. Triggers
Triggers are an automated data change that is caused by another data change to help streamline the process and make it easier for the user.
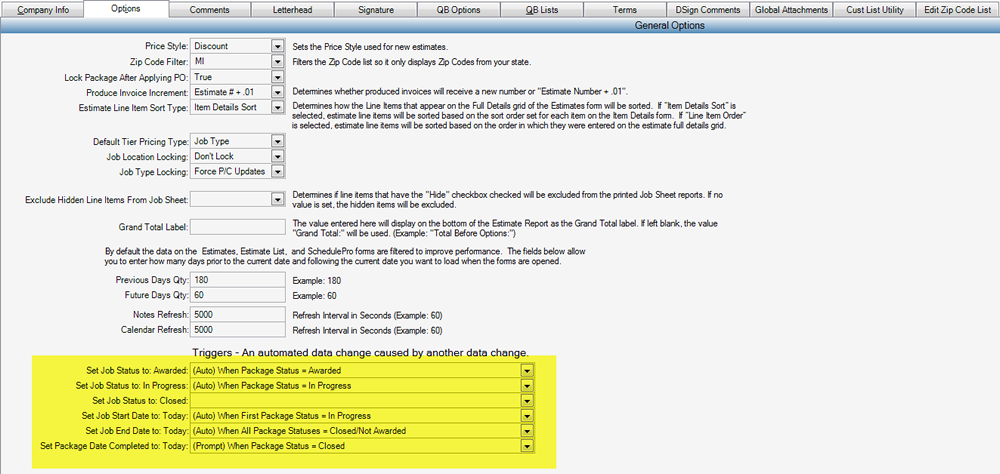
12. Set Job Status to: Awarded
The user can select from three different options in this pull down menu. The first option is “No Action” this doesn’t perform any actions automatically for the user, the next option is “(Auto) When Packages Status = Awarded” this just the job status to awarded as soon as you set the package to awarded it automatically sets the job to awarded without any user interaction, and the last option is “(Prompt) When Packages Status = Awarded” this one does just as it sounds and has a message box that prompts you to mark the job as awarded.
13. Set Job Status to: In Progress
The user can select from three different options in this pull down menu. The first option is “No Action” this doesn’t perform any actions automatically for the user, the next option is “(Auto) When Packages Status = In Progress ” this just the job status to In Progress as soon as the user sets the package to In Progress it automatically sets the job to In Progress without any user interaction, and the last option is “(Prompt) When Packages Status = In Progress” this one does just as it sounds and has a message box that prompts you to mark the job as In Progress.
14. Set Job Status to: Closed
The user can select from three different options in this pull down menu. The first option is “No Action” this doesn’t perform any actions automatically for the user, the next option is “(Auto) When All Packages Status = Closed/Not Awarded” this just sets the job status to Closed/Not Awarded as soon as the user sets the all packages to Closed/Not Awarded it automatically sets the job to Closed/Not Awarded without any user interaction, and the last option is “(Prompt) When All Packages Status = Closed/Not Awarded” this one does just as it sounds and has a message box that prompts you to mark the job as Closed/Not Awarded.
15. Set Job Start Date: Today
The user can select from three different options in this pull down menu. The first option is “No Action” this doesn’t perform any actions automatically for the user, the next option is “(Auto) When First Packages Status = In Progress” this just sets the job start day to Today as soon as you set the package to In Progress it automatically sets the job start date to Today without any user interaction, and the last option is “(Prompt) When First Packages Status = In Progress” this one does just as it sounds and has a message box that prompts you to mark the job as started today.
16. Set Job End Date: Today
The user can select from three different options in this pull down menu. The first option is “No Action” this doesn’t perform any actions automatically for the user, the next option is “(Auto) When First Packages Status = Closed/Not Awarded” this just sets the job End day to Today as soon as you set the package to Closed/Not Awarded it automatically sets the job End date to Today without any user interaction, and the last option is “(Prompt) When First Packages Status = Closed/Not Awarded” this one does just as it sounds and has a message box that prompts you to mark the job as Ended today.
17. Set Package Date Completed to: Today
The user can select from three different options in this pull down menu. The first option is “No Action” this doesn’t perform any actions automatically for the user, the next option is “(Auto) When Packages Status = Closed” this just sets the Package Date Completed to Today as soon as you set the package to Closed it automatically sets the Package Date Completed to Today without any user interaction, and the last option is “(Prompt) When First Packages Status = Closed/Not Awarded” this one does just as it sounds and has a message box that prompts you to mark the Package Date Completed to Today.
18. Set Appointment Auto Subject
This feature allows users of Allpro Insulator and the calendar to automatically select specific appointment subject. There are 8 options to choose from and some include the Estimate #.

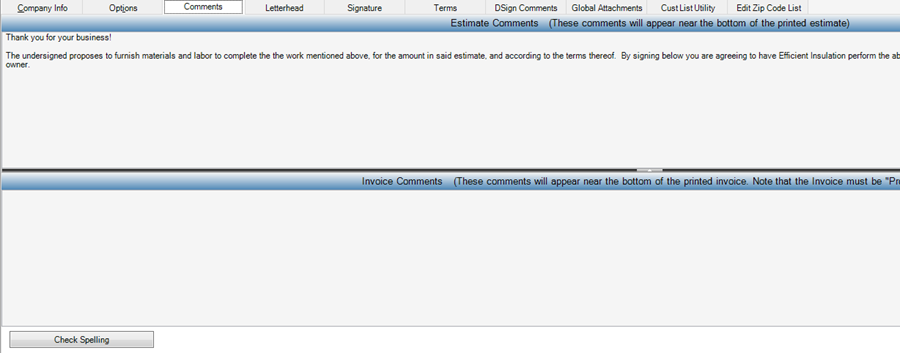
Setting Up Your Comments
Under the Comments tab you will be able to type in text that will be displayed automatically at the bottom of your Estimates or Invoices individually. This text can be changed individually on each estimate or invoice, but the text entered here will be used by default. The Estimate and Invoice comments can also be edited on the Estimate List in bulk or 1 Estimate at a time.
Setting Up Your Estimate/Invoice Letterhead
The Estimate header is located on the top left side of the printable estimates and invoices reports. You can setup Allpro Insulator to display your header in one of three ways by selecting your desired style from the Header Type field located on the top of the Letterhead tab of the Company Setup form.
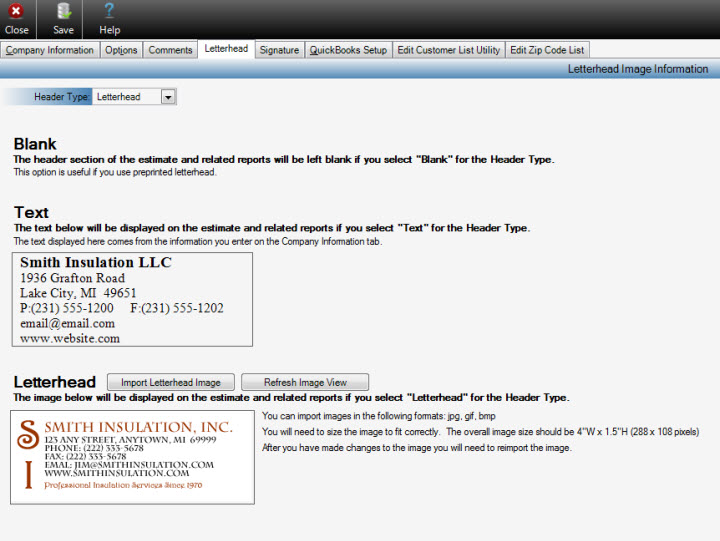
1. Blank
Use the Blank Header Type if you plan on printing your estimates and invoices on paper that has a preprinted letterhead. When you select the Blank Header Type Allpro Insulator will not print anything on top left portion of the printable estimates and invoices reports.
2. Text
Use the Text Header Type if you want Allpro Insulator to print your company information on the top left portion of the printable estimates and invoices reports. The data you type in the Company Information tab of the Company Setup form is used to generate this type of header.
3. Letterhead
Use the Letterhead Header Type if you would like to print your own custom image on the top left portion of the printable estimates and invoices reports. This method allows you to fully customize the appearance of your letterhead and also include your company logo. To create your own custom letterhead you simply create your own image and save it as a bitmap,jpeg,gif. In order for the image to fit correctly the overall image size should be 4” Wide x 1.5” High. However, the image can be larger if the same pixel ratio is held.
Setting Up Your Signature Image
In some cases you may want to send estimates to your customers via email. One drawback to sending estimates directly from the computer via email is the inability to sign the estimate to verify that you agree to the details specified on the estimate. Allpro Insulator now allows you to create a signature image that can automatically be placed on the estimate.
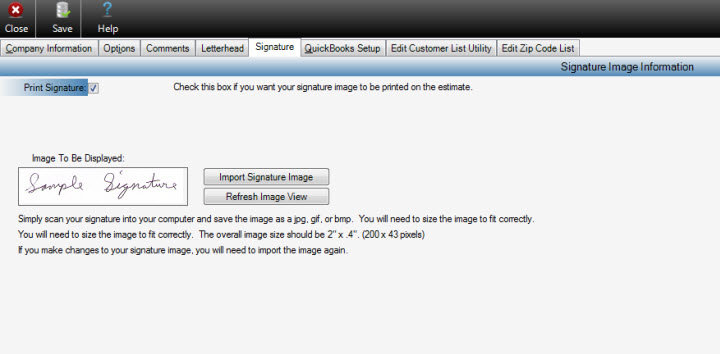
1. Create a Digital Signature
To create your digital signature image sign a piece of white paper. Then scan the image and crop the image so its overall size is 2” Wide x .4” High.
2. Display Signature on Estimate
If you want your signature to appear on the printable estimate, check the Print Signature box.
QuickBooks Option – QBE Only
This form allows the user to configure the options for sending QuickBooks data from insulator.
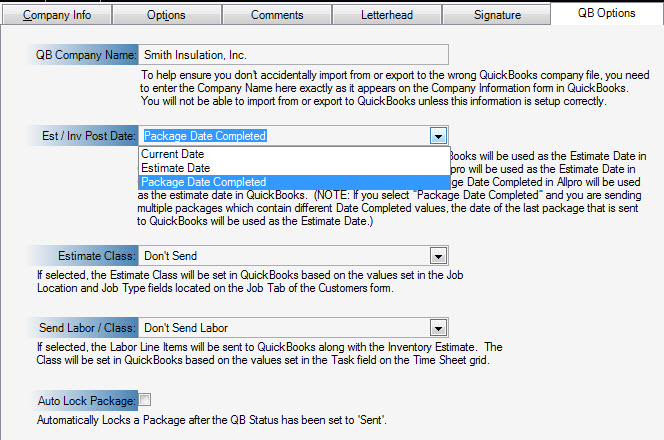
1. QB Company Name
To help ensure you don’t accidentally import from or export to the wrong QuickBooks Company file, you need to create a link between Allpro Insulator and the QuickBooks Company file you want to connect to. On the Company Information form in QuickBooks you can enter in your company name. You need to type that same name in the QB Company Name field on the Allpro Insulator Company Setup form. These two names have to be typed exactly the same in Allpro Insulator and QuickBooks in order to communicate with QuickBooks.
2. Est/Inv Post Date
This is so you can set the date of the estimate or invoice that you send to QuickBooks.
- Current Date – Sets the date of the Estimate in QuickBooks to the date the new Estimate was first created in Allpro Insualtor
- Estimate Date – Sets the Estimate date in QuickBooks to match the Estimate date entered for the current Estimate in Allpro Insulator
- Package Date – Sets the Estimate date in QuickBooks to match the date the selected Package was completed.
3. Estimate Class
If “Job Location: Job Type” is selected then the Estimate Class will be set in QuickBooks based on the values set in the Job Location and Job Type Fields located on the Job Tab of the Customers form.
4. Send Labor/Class:
If “Job Location: Job Type” is selected then the Estimate Class will be set in QuickBooks based on the values set in the Job Location and Job Type Fields located on the Job Tab of the Customers form.
5. Auto Lock Package:
If you have this box checked it will automatically lock a package after it has been sent to QuickBooks.
NOTE: The QODBC Driver is needed in order for Allpro Insulator to communicate with QuickBooks. With your original purchase of Allpro Insulator, Allpro Technology provides you with one QQODBC Driver license. If you require additional licenses or have recently upgraded QuickBooks, please call (231) 839-7928 for assistance installing and activating the QODBC Driver.
QuickBooks Lists- QBE Only
The QuickBooks Lists options allow the user to pull certain data from QuickBooks into Allpro Insulator, manage QuickBooks Logs, and help ensure that there are is mismatched data between Allpro Insulator and that already in QuickBooks.
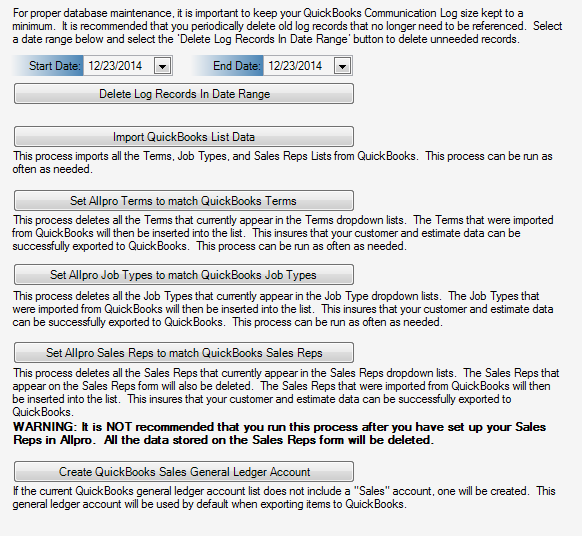
1. Delete Log Records in Date Range
For proper database maintenance, it is important to keep your Quickbooks Communication Log size to a minimum. It is recommended that you periodically deleted old log records that are no longer needed for reference. Select a date range and press the Delete Log Records In Date Range to delete any unwanted records.
2. Import QuickBooks List Data
This will verify that the information in QuickBooks matches the information in Allpro Insulator. This process can be ran as much as needed.
3. Set Allpro Terms to match Quickbooks Terms
This process deletes all the Terms that currently appear in the Terms dropdown lists, imports them from Quickbooks, and inserts them into Allpro Insulator. This ensures that your customers and estimate data can be successfully exported to Quickbooks. This process can be run as often as needed.
4. Set Allpro Job Types to match QuickBooks Job Types
The process deletes all the Job Types that currently appear in the Job Type dropdown lists, and inserts the Job Types configured in QuickBooks. This ensures that your customer and estimate data can be successfully exported to QuickBooks. This process can be ran as often as needed.
5. Set Allpro Sales Reps to match QuickBooks Sales Reps
This process deletes all the Sales Reps that currently appear in the Sales Reps dropdown lists and Sales Rep form. The Sales Reps created in QuickBooks will then be inserted into the list. This ensures that your customer and estimate data can be successfully exported to QuickBooks. If you have already created Sale Reps in Allpro, and want them to match QuickBooks. It will delete the sales reps’s Associated User Name, Estimate Access, Lock Prices, Estimate # Range Start, Estimate # Range End, Disc/Mark% Min,Disc/Mark % Max,Target Profit % Min,Targ Profit % Max, Phone,Email,Comments and Active.
6. Create QuickBooks Sales General Ledger Account
If the current QuickBooks general ledger account list does not include a “Sales” account,one will be created . This general ledger account will be used by default when exporting items to QuickBooks.
Terms
Terms are what can be created to show up on the estimate forms for the customer. An term is what the user and the customer would agree on for a payment type and when it would be due. QuickBooks Edition users must make changes to the Terms values from within Quickbooks and then re import the Terms into Allpro.

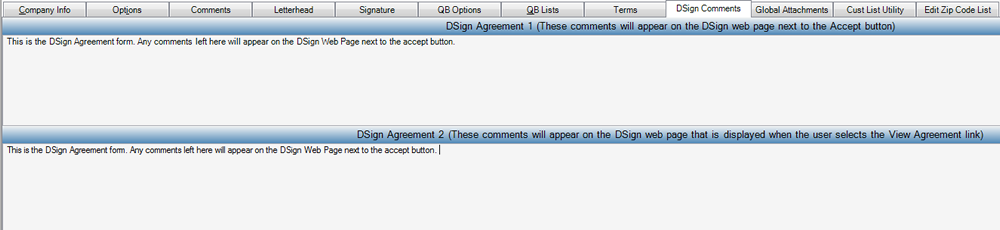
DSign Comments
This feature will only show up if the user has purchased the addition module. This is were the user will put in the default comments for dsign agreement 1 and 2. The Dsign agreement 1 will appear on the Dsign web page next to the Accept button. DSign Agreement 2 will appear on the DSign web page that is displayed when the user selects the View Agreement link.
Global Attachments
Global Attachments can automatically attached to emails messages when estimates. Not that the user must have the have the “Attach Product Spec Sheets” checkbook checked on the Preferences form in order for the attachments to automatically be added. This makes it easier for the user to have specs sheet attached incase user forgets to attached to estimate.
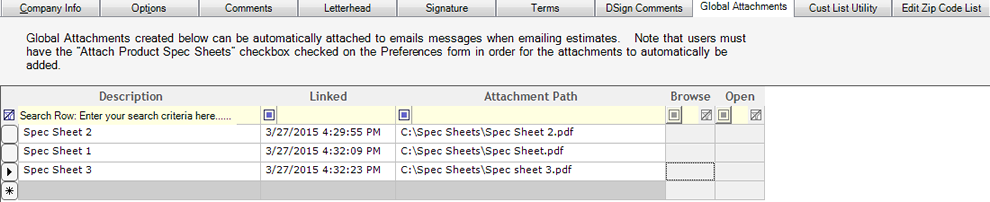
Steps to create a global attachment:
1.. Description – Give a brief explanation of what this document contains.
2. Linked – This field is editable but it’s filled in when you start to create the global attachment.
3. Attachment Path – This field is also editable we do not recommend that you manually type a path but rather use the browse button.
4. Browse – lets you select the file by using a browse dialog.
5. Open – Opens the file you have in the attachment path.
The Edit Customer List Utility
Global Attachments can automatically attached to emails messages when estimates. Not that the user must have the have the “Attach Product Spec Sheets” checkbook checked on the Preferences form in order for the attachments to automatically be added. This makes it easier for the user to have specs sheet attached incase user forgets to attached to estimate.
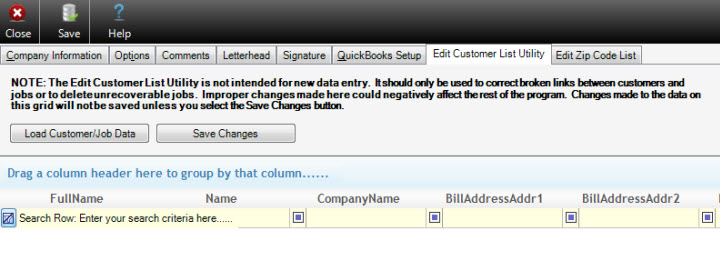
When you select the Load Customer/Job Data button all of the Customers and Jobs will be loaded into the grid. You can make changes to the data as well as delete unnecessary records. When you are finished making changes select the Save Changes button to save your changes back to the database.
Please call (231) 839-7928 for assistance with the Edit Customer List Utility.
The Edit Zip List Form
This utility is setup so you can add new zip codes to your local area as needed.
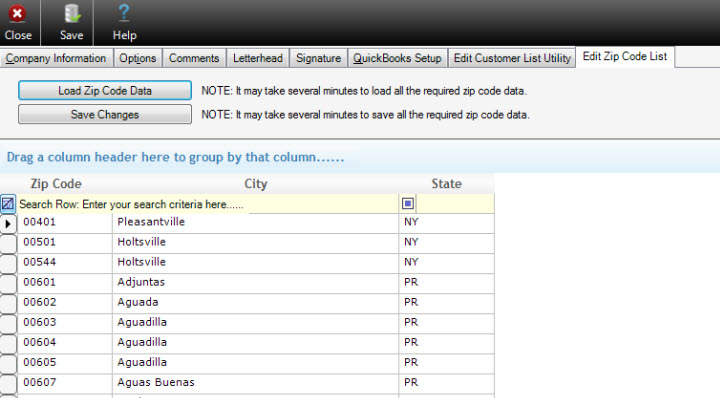
To use this utility simply press the “Load Zip Code List” and scroll through the list to find the zip code you wish to edit. You can type directly into the fields to edit the existing information or scroll to the very bottom to enter new information.