The QuickBooks Communicator
The QuickBooks Communicator is a handy tool that lets you share information between Allpro Insulator and QuickBooks. This form helps to consolidate all of the tasks of data transfer into one simple form.
Importing Data From QuickBooks
The QuickBooks Communicator Import form allows you to choose specifically which data you would like to import into Allpro Insulator. Place check-marks in the boxes for the items you would like to import and press “Yes”.

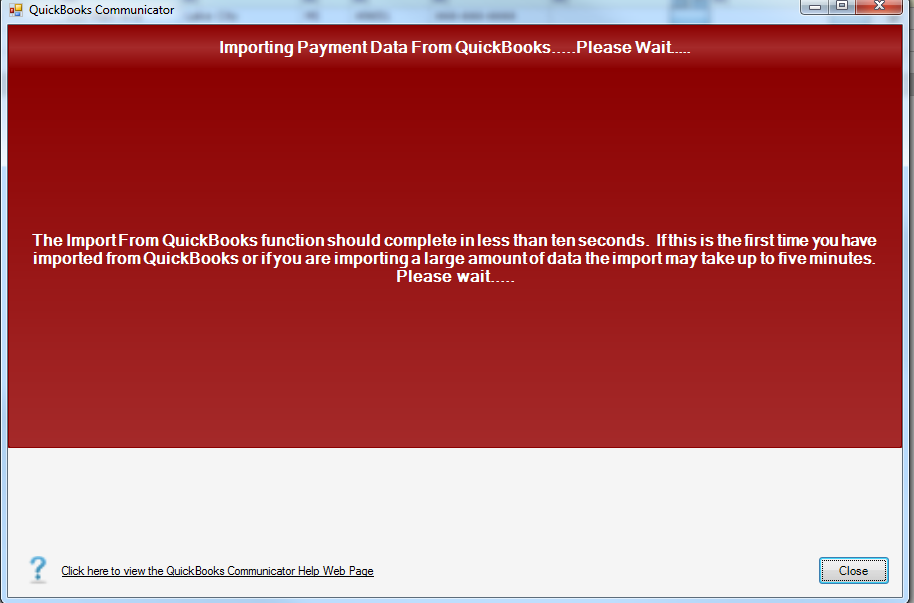
Once you have clicked “Yes” to continue, the communicator will display in red. First it will check to make sure you are connected to the proper QuickBooks Company file. After it has determined you are connected to the proper company file it will begin the import of data.
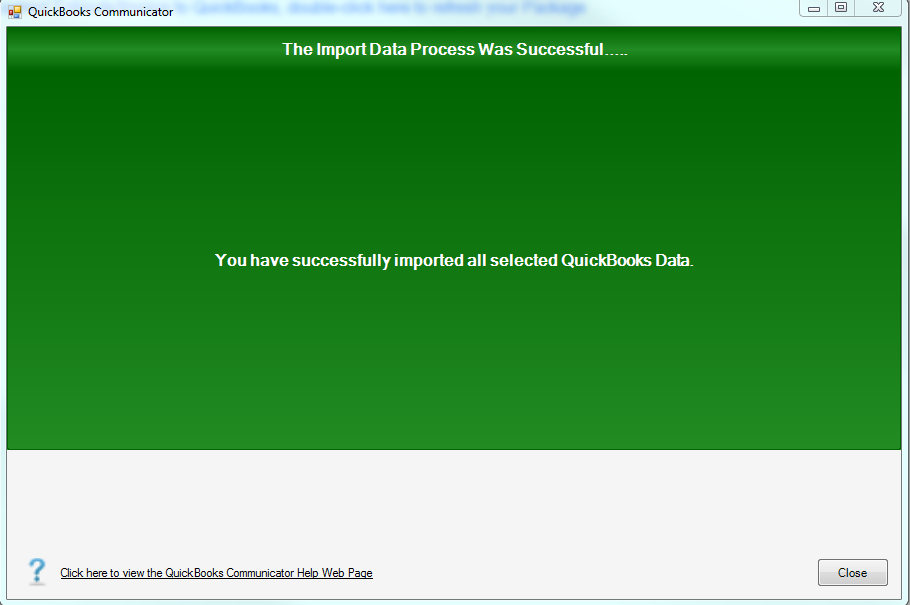
After this process has completed, you will be greeted by a green “Success” screen.
Exporting Data To QuickBooks
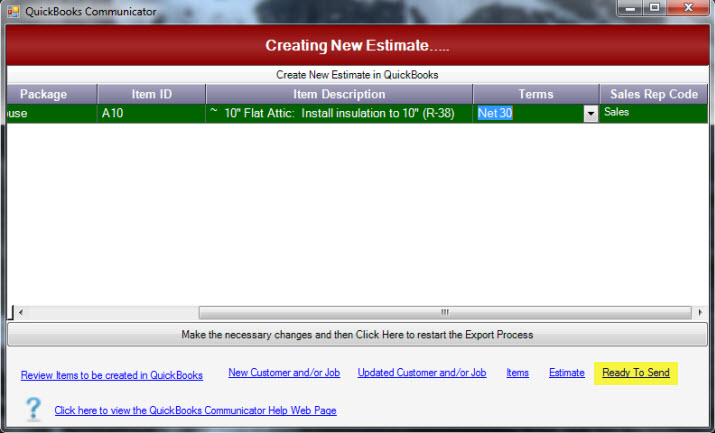
When you choose the “Create QuickBooks Estimate” option from the estimates form you will again see the QuickBooks Communicator form. The form will list all of tasks that will be completed during this process. It will also give you an option to not send updated customer info, if you just want to send the current information you are working with you will want to check this option. If left unchecked it will go through and update and data (i.e. phone number, address, etc..)
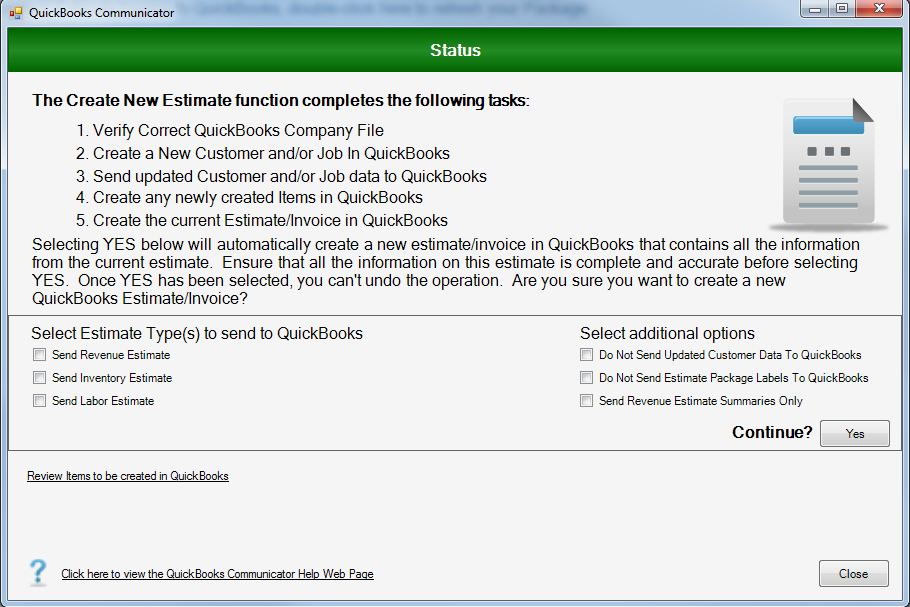
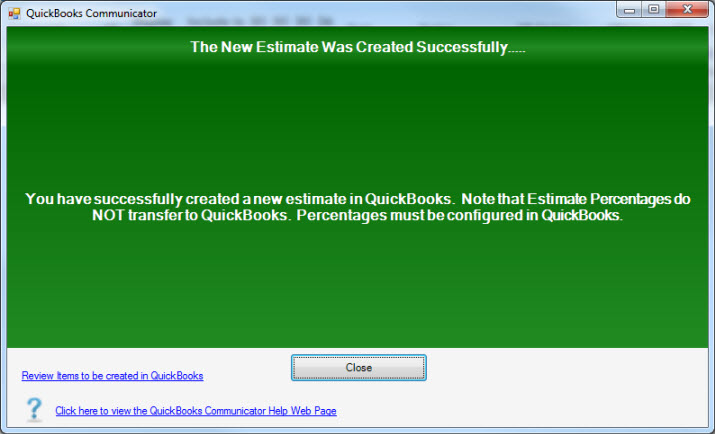
Once you click “Yes” to Continue, Allpro Insulator will begin a series of events. Allpro insulator will send the Customer for this Estimate to QuickBooks (if it does not already exist in QB). Then it will create the Job that the Estimate is for, and then it will send the Estimate to QuickBooks. This process eliminates all double entry of data and the entire process takes less than one minute. You will also notice that during this process Allpro Insulator will send updated customer info. This process checks to see if any changes were made to any other customers in your Allpro Insulator customer list (i.e. phone numbers, address) and they will be sent to QuickBooks. This helps to keep all data up to date on both ends. Allpro insulator will also send any new Items that have been created at this time. Any Item used for estimating must be sent to QuickBooks. Checking for new Items at this point will insure that QuickBooks is up to date with all of the information in Allpro Insulator. Once this process has been completed, you will find your Customer, Job, and Estimate in QuickBooks. If everything has completed successfully you will be presented again with the green success screen.
Errors when sending to QuickBooks
here may come a time when you receive an error while trying to send to QuickBooks. QuickBooks validates all data before it will import. If the data is not validated by QuickBooks you will receive an error telling you this. Most errors are caused by invalid “Terms”, “Sales Rep”, or “Job type”. We will cover these 3 most common errors, and show you how to trouble shoot errors in general.
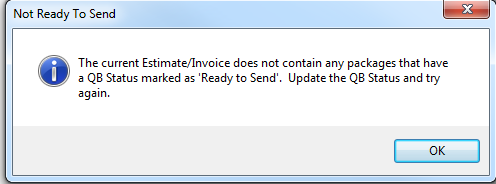
In this first example, Allpro Insulator is letting you know that you have not marked a package as “ready to send”. This is a common error and is easily fixed. Go to the packages tab on the Estimate form, and selecting “ready to send” under the “QB status” column.

Other errors you may face may not be so easy to figure out. We will cover a few examples, and show you how to fix them using the QuickBooks Communicator.
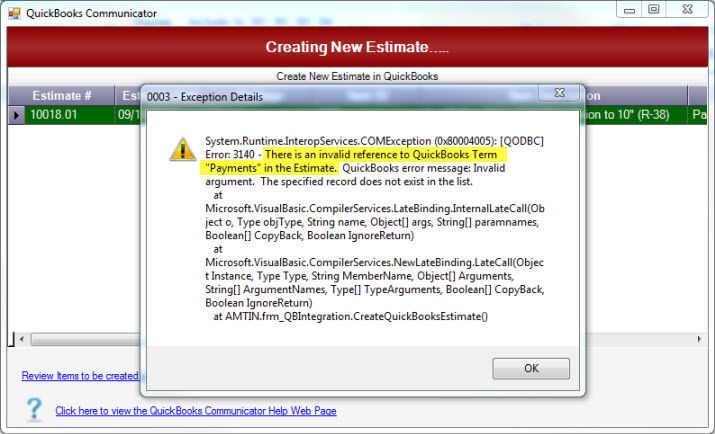
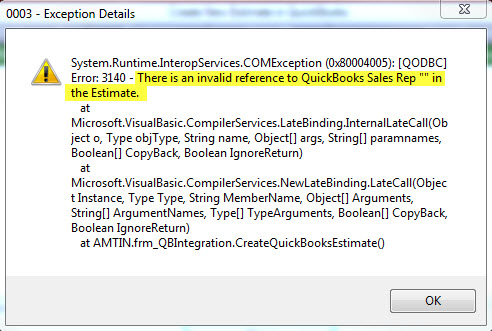
For the first example we have an error that has popped up that does not appear to be telling us what is wrong. If you read through the beginning of the error, it will usually tell you what has gone wrong. In this example it is referring to the “Terms” you have selected for this Estimate. Your Terms must be setup in both Allpro Insulator and QuickBooks. If QuickBooks does not have the Terms you are trying to send, you will get this Error. We have highlighted the portion of this error in yellow so you can see where the actual error is referenced.
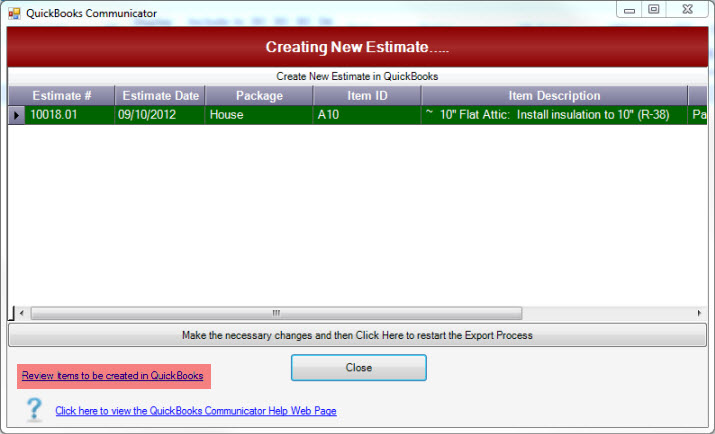
Now that we have determined our issue, we can make the changes needed to fix it using the QuickBooks communicator. Click “OK” on the error, and select “Review items to be created in QuickBooks” (Highlighted in Red).
Once you have clicked “Review items to be created in QuickBooks”, you will be able to edit the terms that were entered incorrectly. Using the scroll bar on the bottom, scroll across the screen until you see the column labeled “Terms”. If you click into the field you will be able to select from the drop-down, or type in the terms that need to be entered to correct the issue. If you need the “Term” that you entered that caused the error, go in to QuickBooks and create it.
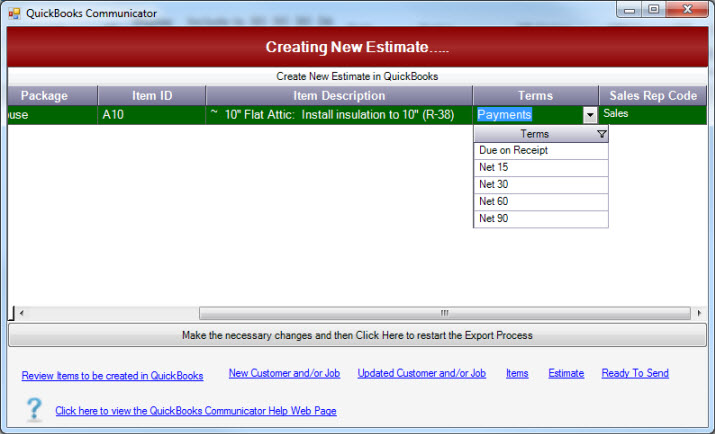
Now that you have the proper “Terms” entered, press the ready to send Button (Highlighted in Yellow).
Again click “Yes” to continue, and you should get the green success screen.

Most errors in this format can be read to find out what the issue is, and is usually listed in the upper portions of the error. We will show you another example and then show you what the error is telling you. The location of the issue in the error will be highlighted in yellow.
In this example a “Sales Rep” was either not selected or not entered in QuickBooks. To fix this example, select a “Sales Rep” from the drop-down list on the Estimate form to correct, or create the “Sales Rep” in QuickBooks.
At some point you may come across an error that will not be an obvious issue, if you come across such an error feel free to contact one of our support agents.