QB Ready List
The “QB Ready List” is a central location where you can check on the statuses of all of your Estimates/Packages. From here you can see which Estimate/Packages have been set as “Ready to Send” and then send them from this same location.
Filtering Data on the QB Ready Form
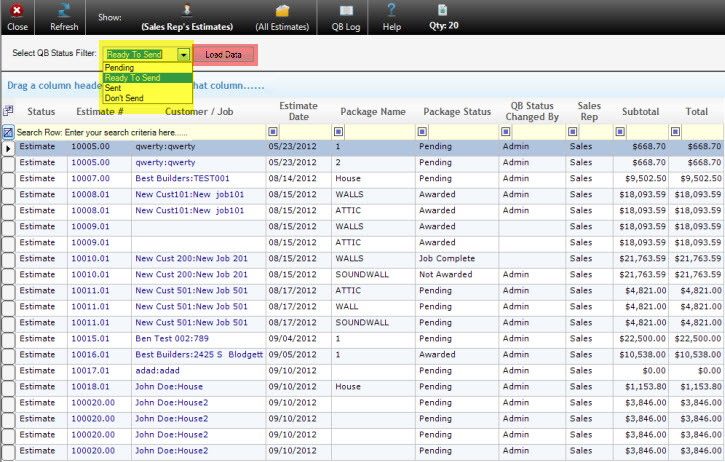
Looking at this form you can see that a lot of information is displayed. You can filter what type of information you want to see by selecting a “QB Status” from the drop-down menu (highlighted in yellow below) and pressing the “Load Data” button (highlighted in red below) next to the drop-down. Once you have done this, all Estimate/Packages that are set to the filter you have chosen (Ready to Send in this example), will now be displayed in the list. You can also choose between “Sales Rep’s Estimates” and “All Estimates” depending if you want to include just the estimates for the user you are logged in as, or every estimate.
Selecting Estimate/Packages to send to QuickBooks
Looking at your list of Estimate/Packages that are “Ready to Send”, you can select each of them one by one to send to QuickBooks. When you highlight a row, you will notice that the grid below will populate with the data for that estimate, and show the packages individually and the status that has been set for them. In this example One package is “Ready to Send” and one package is set to “Pending”. If you need to change the status of one of these packages, you can click on one of the “QB Status” fields for this packages and change its status. At this time you can also choose to change the “Status”, update the “Comments”, or choose to “Include in Total”. Most of this information should be set before you have reached this step, but the ability to modify it is available.

Another option for updating the QB Status fields is to use the utility above this grid. Using the check boxes, you can choose to update all statuses, or check individual statuses to update (Revenue, Inventory, and Labor). After selecting the status that needs updated, you can select individual packages that you want to update by placing a check in the box under the “Update QB status) column. If you want to set the status for all packages, you can place a check mark in the box above labeled “Update All Rows”. Now that you have made your selections as to what you want to update, click in the “Update Statuses to” drop down and select the status you want to set in these fields. Now click the “Update Button” located next to the drop-down. After pressing “Update”, your selections should now be set to the proper status.
Once you have determined that the information for the Estimate/Packages is correct, you can begin the process of sending them to QuickBooks. Press the “Create QuickBooks Estimate” button. This will open the QuickBooks Communicator, and begin the process of sending. You also have the option to send directly to QuickBooks as an Invoice by clicking the “Create QuickBooks Invoice” button. When either of these buttons are pressed the send to QB functions will be turned over to the QuickBooks Communicator. For more information on the QuickBooks Communicator Click Here.
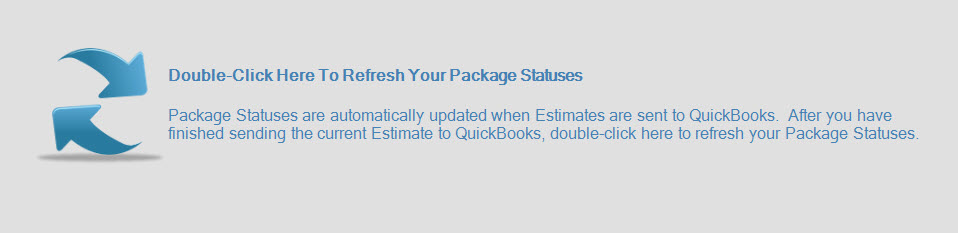
After the communicator has finished sending these packages to QuickBooks, go back to the QB Ready List, you will now notice that the grid is covered by a grey screen requesting you double click it to refresh your packages (shown above). The fields for the QB Status that have been sent have now been automatically updated from “Ready to Send” to “Sent”. Once the status has been changed to “Sent”, Click the “Load Data” button again. Doing this will filter the “Ready to Send” Status and remove the Estimate/Package from the list that you just set as “Sent”.
Repeat this same process for any of the Estimate/Packages that are in this list or that you are ready to send. If you need to change a status to “Ready to Send”, you can change the filter to “Pending”, or “Don’t Send”, and search for the Estimate/Packages that needs updated. Once you have update the status, you can then send them to QuickBooks.
Viewing the QB Log
Keeping track of the status changes that have been made to Estimate/Packages can be very useful. The QB Log is here to provide you with tracking on “QB Status” changes so you can always be up to date on what needs to be sent or what has been sent. You can access the “QB Log” from three locations.
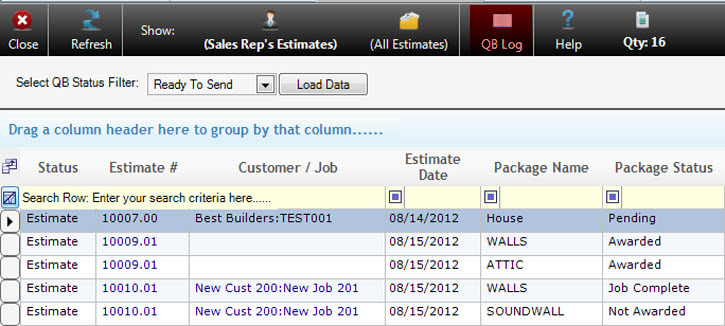
The first is from the “QB Ready List”. This will most likely be the location that office staff, or those responsible for sending Estimate/Packages to QuickBooks will access this log. To open the “QB Log” from this location, click on the “QB Log” button located in the black tool-bar located at the top of the “QB Ready List” form (highlighted in red below). When opened from this location it will list all status changes to the “QB Status” field, from all Estimate/Packages. Using the log will let you know when Sales Reps or other office staff are ready for you to send these Estimate/Packages to QuickBooks.
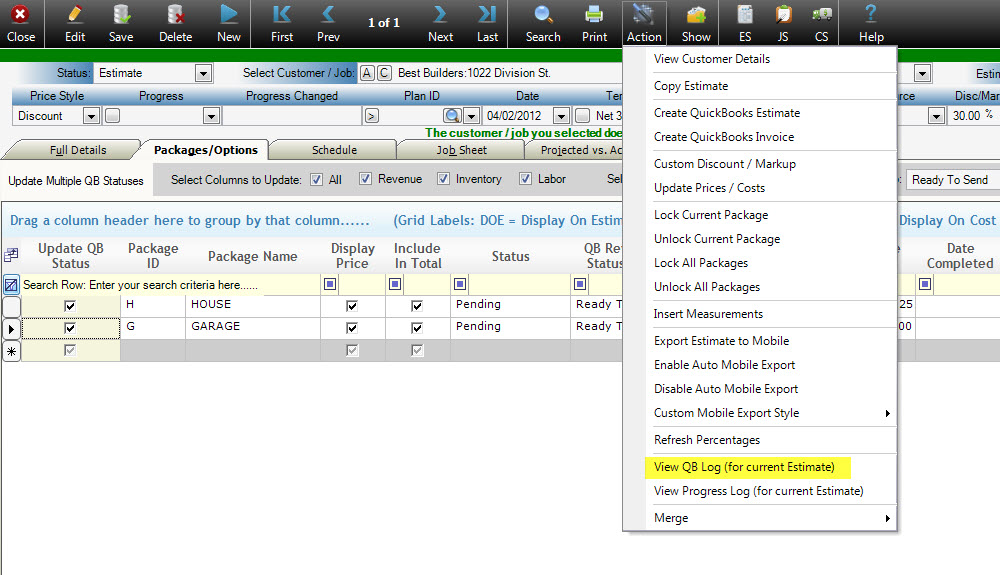
The Second is from the “Estimate” form. This will most likely be the location that Sales Reps will access this log. To open the “QB Log” from this location, click on the “Action” button located in the black tool-bar located at the top of the “Estimates” form (highlighted in yellow below). When opened from this location the sales rep will have a modified view of the “QB Log” that is only displaying information that pertains to the specific estimate they are working on.
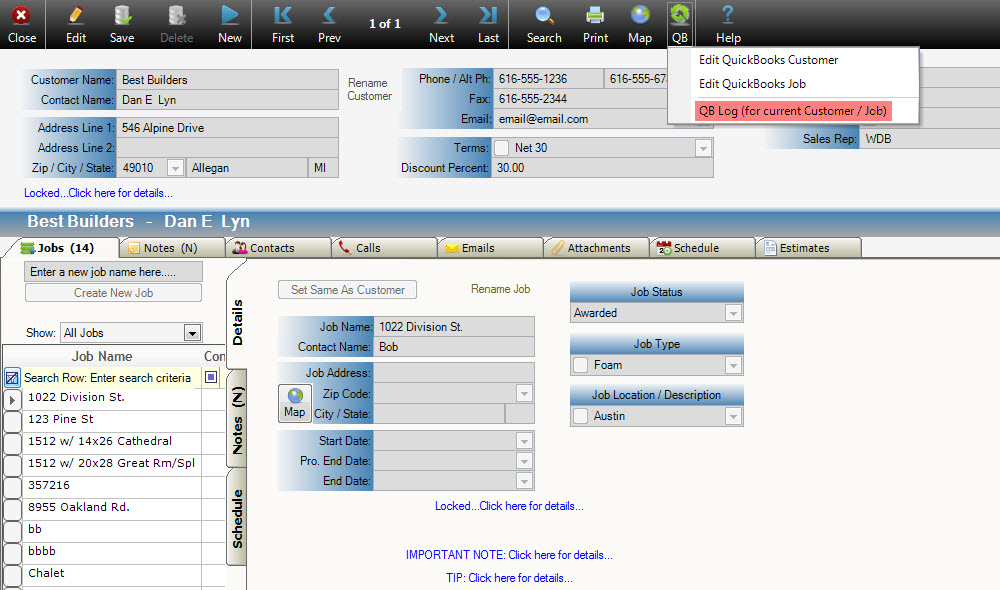
The Third is from the “Customers” form. To open the “QB Log” from this location, click on the “QB” button located in the black tool-bar located at the top of the “Customers” form (highlighted in red below). When opened from this location the user will have a modified view of the “QB Log” that is only displaying information that pertains to the specific customer they are working on.