The Package List Form
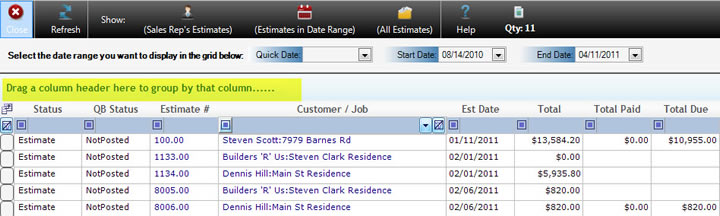
The Package List form allows you to easily locate Estimate Packages and monitor their statuses. When the form is first opened all the Packages that fall between the default date ranges are loaded into the grid. You can change the date ranges by adjusting the date values at the top of the form or you can select the All Estimates button from the tool-bar.
They are sorted by the Estimate #. You can change the way the records are sorted by clicking on one of the blue column headers.
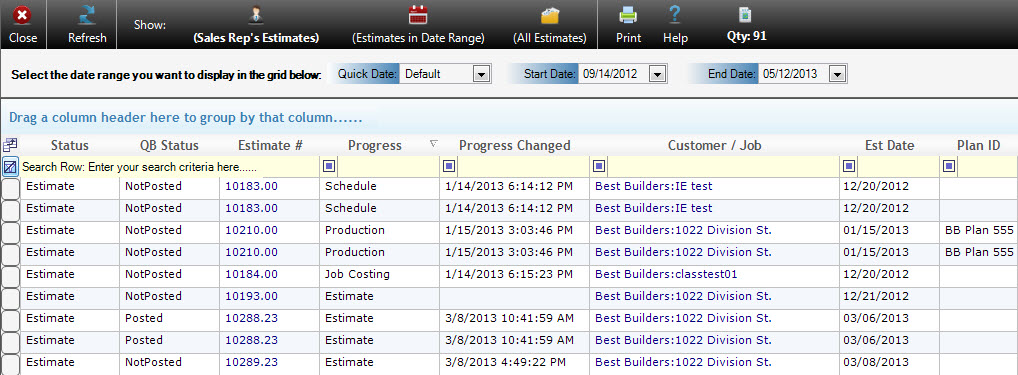
You will also notice that the Estimate # and Customer/Job column text is dark blue and all the other column’s text is black. Blue text in a grid indicates that when selected the text is a link. When you hover your mouse over the Estimate # column, a button will be displayed. If you selected the button the current estimate will be opened in the Estimates form. When you hover your mouse over the Customer/Job column, a button will be displayed. If you selected the button the current Customer will be opened in the Customers form.
Filtering Records
You can filter the records so they only show the record you are looking for by typing information in the blank yellow row near the top of the grid. For example, if you want to look for a Package but you don’t remember the Job’s street number you could type the street name in the Customer / Job column. After you press the Enter key on your keyboard only records containing the information you entered into the search grid will be displayed. When you hover your mouse over the Estimate # column, a button will be displayed.

You can also change the type of filter you want to apply by changing the Filter Type value which is located in the first row of the grid. In the image above you can see that all of the columns are using the “Contains” Filter Type. This is the default Filter Type and is what you will likely use most of the time. To change the Filter Type you simply select the drop-down arrow in the first row and select the desired Filter Type.
For example, say you want to see a list of all the Estimates that do not have “Dan” listed as the Sales Rep. You could scroll over to the Sales Rep column and then change the Filter Type from “Contains” to “Does not contain”. You could then type in “Dan” in the Search Row and select the Enter key on your keyboard. The records will then be filtered and all of the records that do not contain the work “Dan” in the Sales Rep column will be displayed.
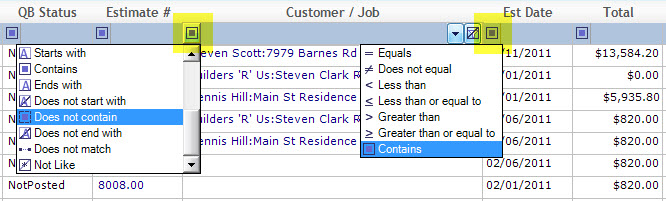
To remove the filter and display all of the records again select the Clear Filter button which is located to the far left of the Filter Row.
Grouping Records
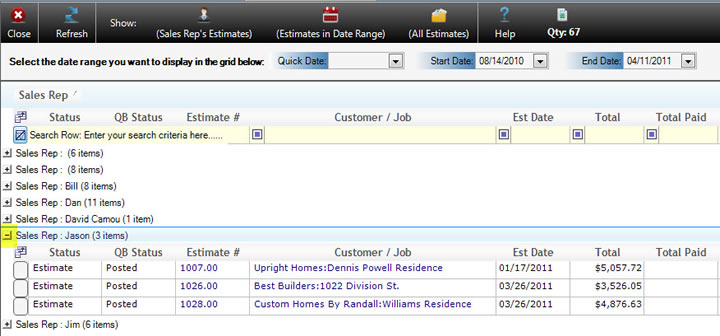
You can also group the records in the grid by dragging one of the blue column headers into the Group By panel which is the blank blue area at the top of the grid. In the image below the user dragged the Sales Rep column into the Group by panel. Notice that all of the records are now grouped by Sales Rep. There is also an item quantity and dollar totals displayed which tells you how many records are in each group and the dollar totals for each group. For example, if you look to the right of “Dan” you will notice that there are twelve records in the “Dan” group.
If you select the “+” sign located to the left of a group all of the records in the group will be displayed. In the image above you will notice that the “+” sign next to “Dan” was selected.
To remove the grouping simply drag the field that you placed in the Group by panel back down into the grid and all of the records will be displayed as they were before the grouping.
Note: All of the grids located throughout Allpro Insulator provide you with a wealth of power and features. We highly encourage you to take some time to become familiar with versatile tools.