Using the Rename Customer and Rename Job Functions
There are several relationships that are created between different sets of data based on the Customer Names and Job Names. The primary data relationships are as follows:
1. Each Job Name you create is linked to its corresponding Customer Name.
2. Each Estimate you create is linked to its corresponding Customer/Job Name.
3. Each Appointment you create using Allpro SchedulePro is linked to its corresponding Customer/Job Name.
Due to these different sets of data being linked by their Customer and Job Names if you simply change a Customer or Job Name you will in effect be breaking their link to the other sets of data.
To change a Customer or Job Name you use the Rename Customers/Jobs form:
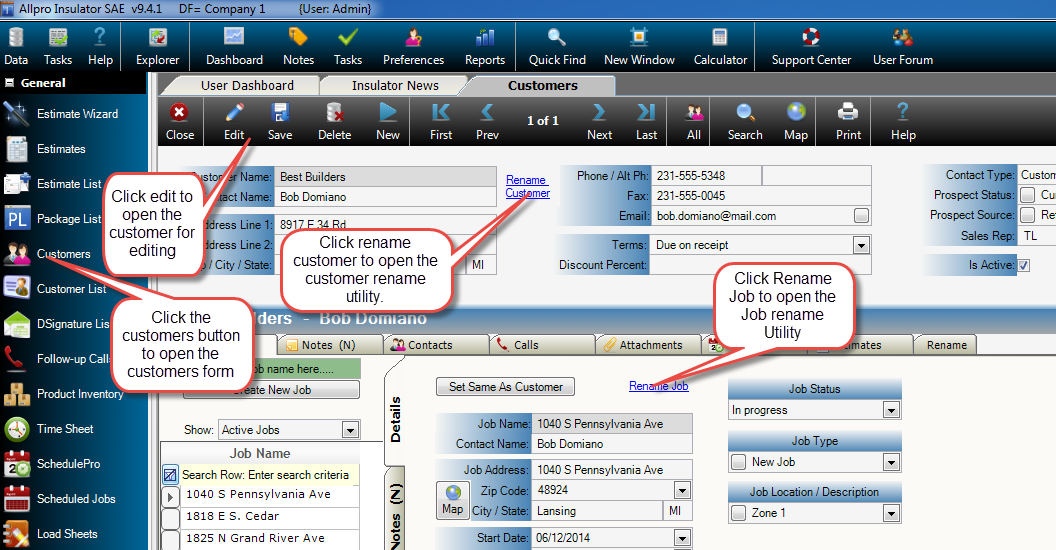
To change a Customer’s Name select the Customer Name you would like to change from the drop-down list. Then enter the new name in the text-box to the right and then select the Rename Customer button. This process will update the Customer Name on the Customers form, Estimates form, and on Allpro SchedulePro.
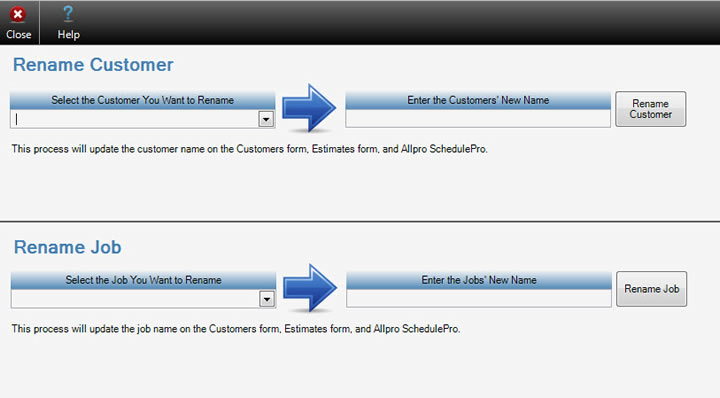
To change a Job’s Name select the Job Name you would like to change from the drop-down list. Then enter the new name in the text-box to the right and then select the Rename Job button. This process will update the Job Name on the Customers form, Estimates form, and on Allpro SchedulePro.
If the customer and/or job you are renaming has already been sent to QuickBooks you have to rename the Customer and/or Job in Allpro Insulator first and then rename the Customer/Job in QuickBooks.
Note: If the Customer and/or Job has been sent to QuickBooks already it’s not recommended to change the Customers name or Job.