
| Working with the Customers Form | Viewing the Customer’s Previous Estimates |
| Entering Customer Information | Working with Customer Attachments |
| Viewing the Customer’s Schedule | Entering Job Information |
Initial Setup of the Customers Form
The initial setup of the Customers Form is done through either entering existing Customers into the system or an import. The import can be from an existing system, spreadsheet or QuickBooks.
The Customers Form does not need to be setup in order to start Estimating with Allpro Insulator. The creation of Estimates with the Estimate Wizard will walk the user through the creation of each Customer.
Directions to complete each step of the setup process can be found on this page. Please scroll down and locate the section where you have a question.
Working with the Customers Form
If you are using Allpro Insulator SAE (Stand Alone Edition) you will be able to create, edit, and delete all customer and job data from the Customers form. If you are using Allpro Insulator QBE (QuickBooks Edition) you will be limited to what customer and job data you can edit from the Customers form.
Throughout this manual we will be referring to Customers and Jobs as “Customer/Jobs”. Just like QuickBooks, Allpro Insulatorallows you to create multiple jobs for a single customer. For example, if you do several jobs for a builder, you enter the builder’s information on the Customers section of the form (the top section). Then you create a separate job record in the job grid (located on the bottom left side of the form) for each job you do for the builder. When you create an estimate you will be selecting the full Customer/Job name which is the Customer Name followed by a “:” followed by the job name. For example, the Customer/Job name for the first job displayed in the image below would display “Sharp Construction:Mike Booms Residence”.
If you are using Allpro Insulator QBE (QuickBooks Edition), you will be able to create new customers and jobs and then export them to QuickBooks. You will also be able to import customer and job data from QuickBooks. If you already have customers and jobs setup in QuickBooks, then you will want to open the Import Data form and import your QuickBooks data before you start entering any new customers. This process will automatically import all of your existing customers and jobs into Allpro Insulator. This makes the transition to Allpro Insulator very quick and simple.
When creating new customers, you have the option to either create them in QuickBooks and then import them into Allpro Insulator or you can create them in Allpro Insulator and then export them to QuickBooks. There are two methods for exporting customers that were created in Allpro Insulator to QuickBooks.
Create Estimate Method
When you send an estimate that was created in Allpro Insulator to QuickBooks the Customer/Job that is associated with the estimate will automatically be exported to QuickBooks if they do not already exist in QuickBooks. QuickBooks does not allow you to create an estimate for a Customer/Job that does not exist so Allpro Insulator checks to verify that the customer was created in Allpro Insulator and verifies that the Customer/Job has not already been sent to QuickBooks. This is the preferred method for exporting customers to QuickBooks because under most circumstances there is no reason to send Customer/Job information to QuickBooks unless they are associated with an active estimate.
Manual Export Method
You can manually export Customer/Jobs to QuickBooks by using the Export Customers form. This form is covered in detail in the Exporting Customers to QuickBooks chapter.
Regardless of which method you choose, after the Customer/Job information has been exported to QuickBooks you cannot edit the Customer/Job information with Allpro Insulator. Any changes you need to make to the Customer/Job information must be changed from within QuickBooks. Any changes you make in QuickBooks will appear in Allpro Insulator the next time you import from QuickBooks. This ensures you don’t accidentally have inconsistent data between Allpro Insulator and QuickBooks.
Entering Customer Information
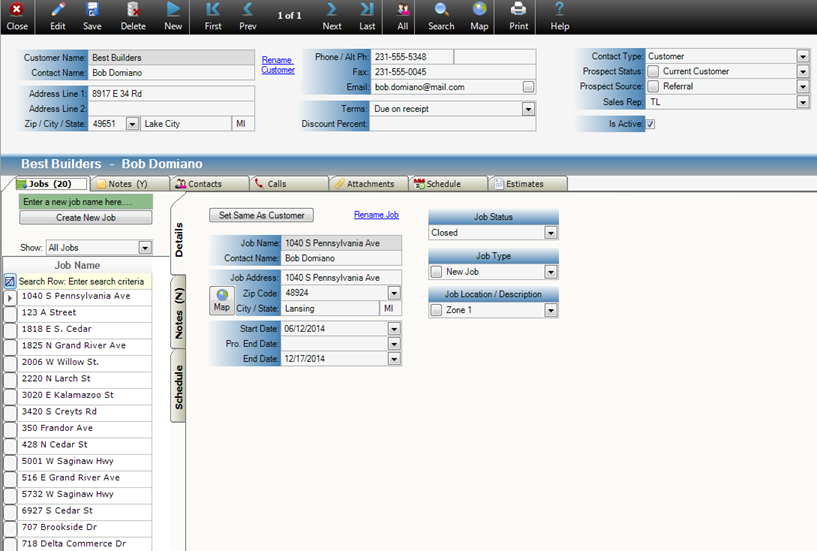
The top section of the Customers form is where you enter the customer information. This would be the homeowner or contractor’s information. To create a new customer, you simply select the New button on the toolbar located at the top of the screen. When you return to a record you will notice that the fields on the form are gray and you cannot edit the data. If you want to make changes to the data select the Edit button (Highlighted in Red) from the toolbar. This will unlock the controls so you can make changes. If the data has been imported from QuickBooks or has been sent to QuickBooks, you will need to select the QB button (Highlighted in Green) and select Edit QuickBooks Customer to be able to edit the data on this form. Using this option for QuickBooks, you will not be able to change the Customer Name, or Job Name, these values must stay the same as what is in QuickBooks.

Zip Code
Allpro Insulator contains a list of over 49,000 zip codes. These zip codes are used to automatically fill in the City and State fields based on the zip code you enter. For example, if you type 49651 in the Zip Code field the City field will be set to Lake City and the State field will be set to MI. While this is a very useful feature, it does take some time to load all 49,000 + zip codes on the form. Prior to using the Customers form you need to select your state in the Zip Code Filter field located on the Company Setup form. Most of your customers are likely located in one state. By entering your state in the Zip Code Filter field on the Company Setup form, only zip codes from your state will be loaded onto the Zip Code field on the Customers form. This will greatly increase the performance.
Email
There is a small button to the right of the Email field. If you click on this button Microsoft Outlook or Outlook Express will open and a new email message will be created with the Customer’s email address entered into the “To” field. Note that this feature only works if you are using Microsoft Outlook or Microsoft Outlook Express.
Discount Percent
The Discount Cell is used for setting a default percent off for current customer, this percent will be applied by default for every estimate.
Contact Type
You have three choices for a contact type: customer, prospect, and former prospect.
Prospect Status
This cell is used to keep track of your prospect customer and their standing
Prospect Source
This cell is used to keep track of where you obtained your prospect.
Sales Rep
This cell is used to assign a default Sales Rep for the customer.
Terms
The Terms field provides you with a place to enter the Customers default terms. The terms entered here will automatically be entered onto all estimates that you create for the customer. You will also have the option to change the terms on each individual estimate. You can select the button to the left of the Terms field to edit the items that appear in the list.
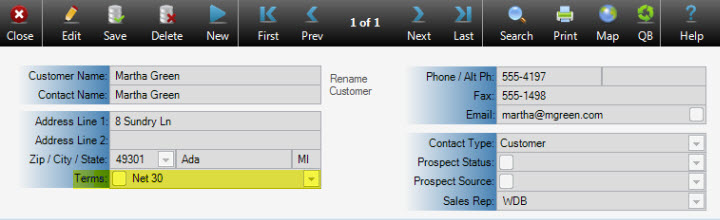
IMPORTANT: If you are using Allpro Insulator QBE you will have to make sure that any terms you enter here are also setup in the Terms List in QuickBooks. This list is accessible from the Lists menu in QuickBooks. If you enter a terms value on the Customers form that is not setup in QuickBooks the Customer/Job will be rejected by QuickBooks when you try to Export the information into QuickBooks.
Contains Notes
The Contains Notes check box will be checked if there are any notes entered on the Customer Notes tab. When you select the Customer Notes tab a large text box is displayed. This text box provides you with a place to enter any additional information about the current customer. By looking at the Contains Notes checkbox you will be able to determine if there are any notes you may need to review without having to actually select the Customer Notes tab.
Locked…Click here for details…
The Locked text link is displayed if the customer you are currently viewing has been sent to QuickBooks. Keep in mind that if a customer has been sent to QuickBooks you can no longer edit the customer information in Allpro Insulator. To make changes to customer information you will have to edit the data in QuickBooks and then re-import your data from QuickBooks into Allpro Insulator. The Locked text link allows you to easily tell if the customer you are viewing has been sent to QuickBooks so you know if you can edit the data.
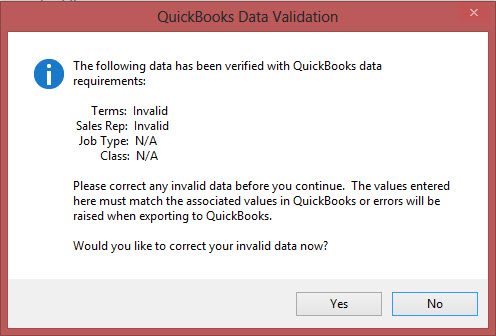
QuickBooks Data Validation
If you are using Allpro Insulator QuickBooks Edition, you will be given notice of invalid data being entered onto the estimate. The QuickBooks data validation tool checks to make sure that information being entered by the sales reps, matches the information in QuickBooks. For the customer and jobs, this tool will Validate your “Terms”, “Sales Rep”, “Job Type”, and optionally, “Class”. If you get an error that is telling you that specific data is Invalid (shown Below), simply navigate to those fields and choose valid options. If this error persists, addition setup may be needed in your “Company Info and Preferences”. For full instructions on how to set up this feature for proper data validation, visit the “Company Setup” page HERE.
Viewing the Customer’s Schedule
The Schedule tab shows a list of all the appointments that were scheduled for the current customer using Allpro SchedulePro. All appointments are created using Allpro SchedulePro. The Schedule tab is used to view appointments only. This tab is very useful when a customer calls you to verify when their job is scheduled to be completed. You can view the customer in the Customers form and then easily view their full schedule. The Schedule tab is also useful when you want to review when jobs were completed for certain customers.
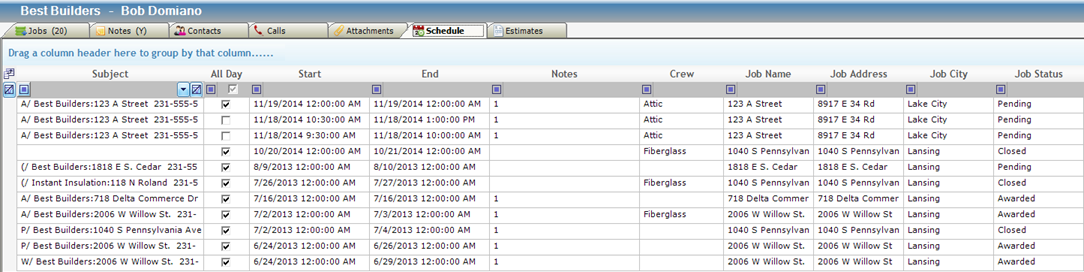
There are also two Customer Schedule reports available from the Print menu on the Customers form tool-bar.
Viewing the Customer’s Previous Estimates
The Previous Estimates tab lists all the estimates that were created for the current customer. You can also select the View button to open the selected estimate.

Working with Customer Attachments
he Attachments tab allows you to create a link to external documents for the current customer. For example, you may have a contract that was created using Microsoft Word or a document that you scanned into the computer as an image. In the Description column you enter a brief description about the file you will be linking to and then select the Browse button. The Open dialog box will be displayed. You can then navigate to the file you would like to link to and then select the Open button. A link will then be created to the file and the file path will be displayed in the Attachment Path column. You can then open the document by selecting the Open button.

By creating links to these external documents you can easily view all of your customer’s information from the Customers form even if some of the information is stored outside of Allpro Insulator. There is also no quantity limit so you can link to as many files as you need.
Follow-up Calls
On this tab is where you can keep track of calls made and received by for this customer.
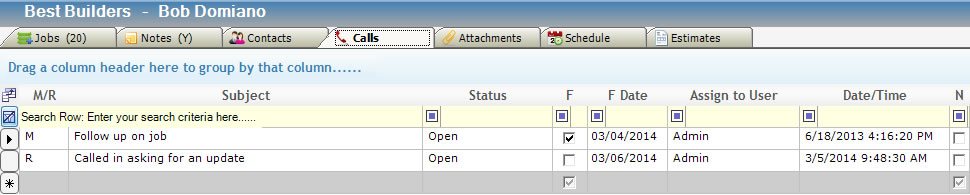
The “M/R” Field is for Made and Received Calls
The “Subject” Field is to be entered as something to remind you what the call was about.
The “Status” Field is where you input where you are in the phone call. Options are Open, Closed, Pending and Initial Contact.
The “F” Checkbox is to schedule a follow up phone call to show on the User Dashboard.
The “F Date” Field is used to set the Date on which to return the call.
The “Assign to User” Field is to assign the follow up to someone so it shows on the User Dashboard.
The “Date/Time” Field is automatically filled in when you create this line.
Entering Contacts
On the Contacts tab is where you can enter Sub Contacts so if you need to contact more than just the person on the customers form.

The “Contact” Field is where you would enter the contacts name.
The “Comments” Field is where you would enter comments about this contact.
The “Work Phone” Field is where you would enter the contacts work phone number.
The “Home Phone” Field is where you would enter the contacts home phone number.
The “Cell Phone” Field is where you would enter the contacts cell phone number.
The “Fax” Field is where you would enter the contacts fax phone number.
The “Email” Field is where you would enter the contacts Email address.
The “Title” Field is where you would enter the contacts job title.
The “Department” Field is where you would enter the contacts department within the company.
The “City” Field is where you would enter what city this contact is from.
Entering Notes
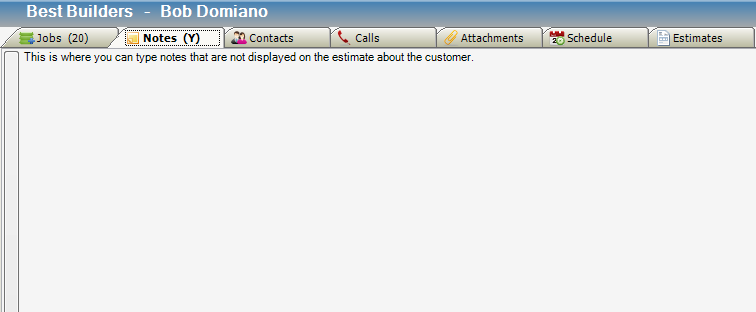
This is where you can enter notes about the customer that only shows up here it does not show up on the estimate or any place else.
You would write thing that you would like to remember about this customer.
Entering Job Information
The bottom section of the Customers form is where you enter the job information. You can have an unlimited quantity of jobs for each customer. To create a new job you simply start typing the job name in the bottom row of the grid located on the bottom left side of the screen. After you enter the job name select the Go button and then you can enter the details about the job on the right side of the screen. To navigate from job to job click on the job name in the grid and the related job details will be displayed on the right side of the screen. You cannot create an estimate for just a customer. You have to create at least one job for each customer before you can create an estimate for that particular customer.
By default only jobs that do not have a Job Status of “Closed” will be displayed in the job list. To display all jobs select “All Jobs” from the Show drop-down box. Once you have completed a job it is recommended that you change the Job Status to “Closed”. This will eliminate that particular job from all form lists and drop-down lists which makes selecting the active jobs much easier.

Tip: After you enter the Job Name in the grid you can press the Tab key on your keyboard to set the focus to the Go button. You can then press the Space bar button to automatically insert all of the customer information from the top portion of the form into the Job Details portion of the form. This is useful when the job will be performed at the homeowner’s existing location. If you only want to insert the Job Name and the Contact Name into the Job Details section you can select the “J” key on your keyboard when the Go button has the focus. This is useful when you are performing a new job for a contractor because the job location will not be the same as the customer’s location.
When you return to a record you will notice that the fields on the form are gray and you cannot edit the data. If you want to make changes to the data select the Edit button from the tool-bar. This will unlock the controls so you can make changes. Keep in mind that if the data has been imported from QuickBooks you will not be able to edit the data on this form. The data will have to be edited from within QuickBooks and then re-imported into Allpro Insulator.
Just like with the Customer’s section located at the top of the screen there is a Schedule tab in the Jobs section of the form. When you view the Schedule tab only appointments that are scheduled for the current job will be displayed. This allows you to easily look at the individual schedule for each job. There is also one job schedule report that is available from the Print menu on the tool-bar.
Using the Rename Customer / Job Utility
There are several relationships that are created between different sets of data based on the Customer Names and Job Names. The primary data relationships are as follows:
- Each Job Name you create is linked to its corresponding Customer Name.
- Each Estimate you create is linked to its corresponding Customer/Job Name.
- Each Appointment you create using Allpro SchedulePro is linked to its corresponding Customer/Job Name.
Due to these different sets of data being linked by their Customer and Job Names if you simply change a Customer or Job Name you will in effect be breaking their link to the other sets of data.
To change a Customer or Job Name you use the Rename Customers/Jobs form.

To change a Customer’s Name select the Customer Name you would like to change from the drop-down list. Then enter the new name in the text-box to the right and then select the Rename Customer button. This process will update the Customer Name on the Customers form, Estimates form, and on Allpro SchedulePro.
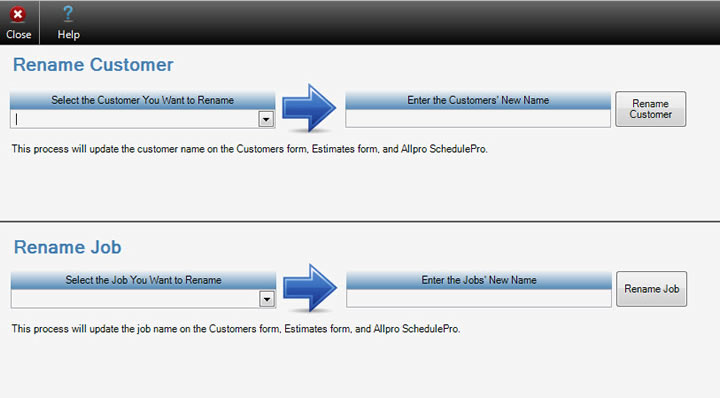
To change a Job’s Name select the Job Name you would like to change from the drop-down list. Then enter the new name in the text-box to the right and then select the Rename Job button. This process will update the Job Name on the Customers form, Estimates form, and on Allpro SchedulePro.
If the customer and/or job you are renaming has already been sent to QuickBooks you have to rename the Customer and/or Job in Allpro Insulator first and then rename the Customer/Job in QuickBooks.
Note: If the Customer and/or Job has been sent to QuickBooks already it’s not recommended to change the Customers name or Job.
| Working with the Customer Form | Viewing the Customer’s Previous Estimates |
| Entering Customer Information | Working with Customer Attachments |
| Viewing the Customer’s Schedule | Entering Job Information |