
Job Costing in Allpro Insulator
Proper job costing will tell you a number of important things, including whether you actually made any money on a job. By calculating all of your material and labor expenses, you can determine if pricing needs adjustment, and costs are adequately accounted for. The Job Costing form can be access from the Action menu on the Estimate form, as well as some Launch menus.
Estimate Items/Products
The Estimate Items / Products tab is where the user will enter any information related to Job Costing in Allpro Insulator.

- Package ID– Displays the Package ID of the package that is currently going to be split.
- Item ID – Displays the ID of the item that will be split for job costing purposes.
- Description – Displays a description about what the line item is. This information is pulled directly from the Estimates Form.
- Projected Unit Quantity – The Projected Unit Quantity column displays the projected number of units of the line item, that will be needed to finish the job. This information is pulled from the Quantity Column of the Estimate Form
- =P – The First =P Button allows the user to set the Actual Material Unit Quantity to equal the Projected Unit Quantity
- Actual Material Unit Quantity – The Actual Material Unit Quantity Column allows the user to enter the Actual amount of material units used. This Column can be entered manually or by hitting the first =P button which will set Actual to equal projected.
- Difference – The Difference Column displays the Difference between Projected Material units used and Actual Material Units used.
- =P – The Second =P button sets the Actual Labor Unit Quantity to equal the Projected Unit Quantity.
- =M – The =M button sets the Actual Labor Unit Quantity to equal the Actual Material Unit Quantity.
- Actual Labor Unit Quantity – The Actual Labor Unit Quantity field allows the user to set the Actual quantity of Labor Units used for this line item.
- Multi Day Split – The Multi Day split Checkbox brings up the Estimates Item Grid when checked.
- Product ID –The Product ID Field displays the Product ID of the line item.
- Crew – The Crew 1 and Crew 2 Fields are where the user will enter the crew(s) that will be working with the line items.
- Quantity of Assemblies (QA) – The QA Field displays the quantity of sub assemblies associated with each line item. If there are none, this field will be left blank..
- Paid – The Paid Checkbox displays if labor for the line item has been paid for yet. More information on Payments can be found in the Payroll Splits Help page
Estimate Items Splits – Advanced Features Module Only
The Estimate Items / Products tab is where the user will enter any information related to Job Costing in Allpro Insulator.

- Work Date – The Work Date Field displays the date that the work that you calculating costs for took place.
- Equipment ID – Displays The Piece of Equipment that is holding the current item being split.
- Projected Unit Quantity – This Field displays the projected number of units of the current line item that will be needed to complete the current job.
- =P – The First =P button allows the user to set the Actual Material Unit Quantity Field to equal the Projected Unit QuantityField.
- Actual Material Unit Quantity – The Actual Material Unit Quantity Field allows the user to set the Actual Quantity of Material Units used of the current line item. This Field can be entered manually or filled in Automatically by pressing the first =P Button.
- =P – The Second =P button allows the user to set the Actual Labor Unit Quantity to equal the Projected Unit Quantity.
- =M – The =M Button allows the user to set the Actual Labor Unit Quantity to equal the Actual Material Unit Quantity.
- Actual Labor Unit Quantity – The Actual Labor Unit Quantity Field allows the user to set the quantity of Labor Units used in regards to the current line item.
- Crew1 – The Crew 1 (and Crew 2) Field allows the user to enter the crew that will be working with the current line item.
Misc Items
The Miscellaneous Items tab allows the user to enter any sort of Miscellaneous Items that will be used on the current job. A good example of a Miscellaneous Item would be Caulk. This grid works the same way as the Estimate Items / Products Grid, with the only difference being that the items that show up in the Miscellaneous Item Grids will not be on the actual Estimate Form.

- Package ID –The Package ID Field allows the user to select which Package the Miscellaneous Item will be a part of.
- Item Category – The Item Category Field allows the user to set the item category for the miscellaneous item.
- Item ID – This Field displays the Item ID of the Miscellaenous item that is being used.
- Description – The Description Field allows the user to view and edit the description of the line item.
- Quantity – The Quantity Field display allows the user edit the quantity of the Miscellaneous Item being used.
- Projected Unit Quantity – Displays the projected Quantity of units for the current item that will be needed to finish the job.
- =P – The =P button sets Actual Material Unit Quantity to equal Projected Unit Quantity.
- Actual Material Unit Quantity – The Actual Material Unit Quantity Field allows the user to manually enter the actual Material Units used. This Field can also be filled in automatically by pressing the first =P button.
- Difference – Displays the Difference between Actual Material Unit Quantity and Projected Unit Quantity.
- =P – The Second =P button will set Actual Labor Unit Quantity to equal the Projected Unit Quantity.
- =M – The =M Button will set the Actual Labor Unit Quantity to equal the Actual Material Unit Quantity.
- Actual Labor Unit Quantity – The Actual Labor Unit Quantity allows the user to set the Actual Labor Units used for this line item.
- Multi-Day Splits – This Checkbox displays if the current line item will have a multi-day split.
- Product ID – Displays the Product ID of the current Line Item.
- Crew1(2) – Displays the crew(s) that will be working with the current Line Item.
- Paid – Displays if labor for the line item has been paid.
Misc Items Splits – Advanced Features Module Only
The Miscellaneous Items Splits Grid allows the user to split Miscellaneous Items

- Work Date – The Work Date Field displays the date that the work that you calculating costs for took place.
- Equipment ID – Displays The Piece of Equipment that is holding the current item being split.
- Projected Unit Quantity – This Field displays the projected number of units of the current line item that will be needed to complete the current job. This Field is populated from the top grid.
- =P – The First =P button allows the user to set the Actual Material Unit Quantity Field to equal the Projected Unit Quantity Field.
- Actual Material Unit Quantity – The Actual Material Unit Quantity Field allows the user to set the Actual Quantity of Material Units used of the current line item. This Field can be entered manually or filled in Automatically by pressing the first =P Button.
- =P – The Second =P button allows the user to set the Actual Labor Unit Quantity to equal the Projected Unit Quantity.
- =M – The =M Button allows the user to set the Actual Labor Unit Quantity to equal the Actual Material Unit Quantity.
- Actual Labor Unit Quantity – The Actual Labor Unit Quantity Field allows the user to set the quantity of Labor Units used in regards to the current line item.
- Crew1 – The Crew 1 (and Crew 2) Field allows the user to enter the crew that will be working with the current line item.
Misc Products
The Miscellaneous Products grid of the Job Costing form allows the user to enter Miscellaneous products that will be used for the current job. This tab is very similar to the Miscellaneous Items tab.

- Package ID – Displays the Package ID that the Misc. Product is associated with.
- Product ID – Displays the Miscellaneous Product ID that is being used.
- Description – Displays the description of the product.
- Actual Material Unit Quantity – Allows the user to enter the Actual Material Units used of this product.
- Multi Day Split – This checkbox displays if this product will be split.
- Crew1(2) – The Crew Fields display the crew that will be using the current item.
Misc Products Splits – Advanced Features Module Only
The Miscellaneous Products Splits Grid allows the user to split Miscellaneous Products

- Work Date – Displays the date that work was performed using the Miscellaneous Product that is being split.
- Equipment ID – Displays the Piece of Equipment where the Miscellaneous product is being kept.
- Actual Material Unit Quantity – Allows the user to enter the Actual Material Units that were used of the Miscellaneous product(s).
- Crew1(2) – The Crew Fields allow the user to enter the crew that will work with the current product.
Using Job Costing
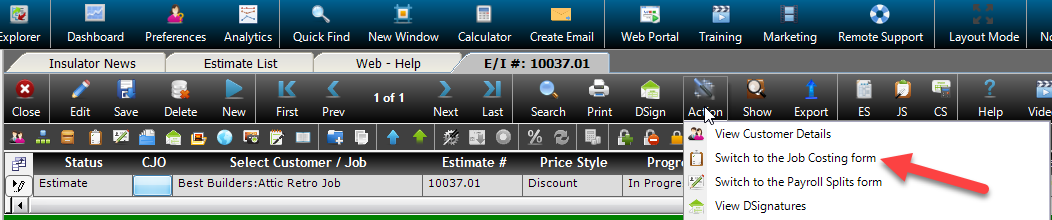
Now that we have covered what each cell on the Job Costing form does, it is time to explain how you would use Job Costing in Allpro Insulator. All Job Costing starts on the Estimates Form. Once you have your estimate all set up, you can move on to the job costing form. There are two ways to do this. The first is to hit the job costing button on the Estimate Form Toolbar (see the image below). The second way is to hit the Action Menu button and click on Job Costing.

This will open up the Job Costing Form. On this form you will be able to enter not only the Quantity of Material units used, but also the Quantity of Labor units that will be paid. If the Advanced Features Module has been purchased, the user also has the option to split the job costing over multiple days. to do this you will click the Multi Day Splits checkbox (highlighted below).

When the Multi Day Splits checkbox is checked, it will open a new grid at the bottom of the Job Costing form. This grid will allow you to input data about Actual Material Quantity and Actual Labor Quantity over multiple days. When you enter data into the Actual Material Unit Quantity and Actual Labor Unit Quantity on the bottom grid, it will automatically add the totals to the line item you are referencing on the top grid. So as you can see in the following image, we were projected to use 520 units of F-CFoam 1500. We used 350 the first day, and 170 the second day. So now the Actual Material Unit Quantity on the top grid equals the 520 units that were projected to be used.

The same things can be done with the Miscellaneous Items and Miscellaneous Products tab, with the only difference being that Misc items and products will not show up on the actual estimate.
From this point you can go to the Payroll Splits form to set up payments for your employees.