Customizing Grid Layouts

v14
Most grids in Allpro Insulator can be customized for ease of use. This includes options to suppress or display fields, sort records alphanumerically, filter entries, group entries, change field order, change field widths, and change field titles. Once a grid is configured as desired, users can press F1 to save the modified layout as default or restore the original settings. Some forms have a Grid Layouts menu item that can be used to save and load multiple custom grid layouts.
Users can also change the layout of the Form Explorer from User Preferences using the Customize Menu tab. Click here for help with menu customization.
- Grid customizations will usually be reset to their original default settings during updates or upgrades to Allpro Insulator.
- Use of the Field Chooser is governed by permissions on the Software Users form.
- Grid customization will not be retained unless the user presses F1 and saves the current grid layout.
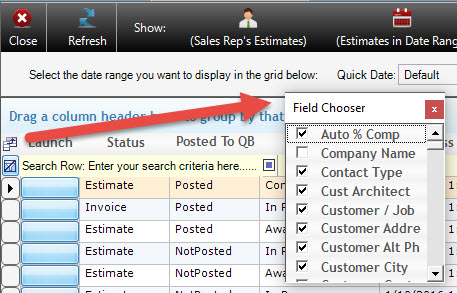
The Field Chooser
The Field Chooser allows users to display or suppress fields in the grid. and can be found to the top left of most grids in the program. When clicked, list containing the fields available in the corresponding grid will open, and users can check or uncheck the box next to each field name to display or suppress that field in the grid. The Icon and Field Chooser list are pictured below.
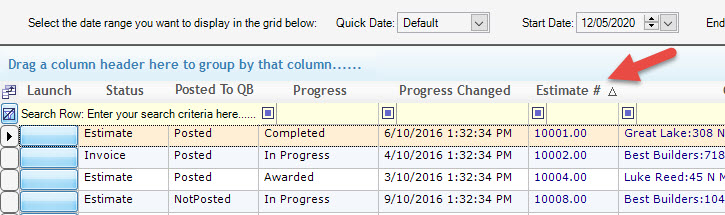
Alphanumeric Sorting
To sort the records in a grid alphanumerically, simply click the title of the field you wish to sort them by. The first time the title is clicked it will sort in ascending order, single click the title again to sort in descending order.
Filtering Entries in a Grid
The entries in a grid can be filtered in a variety of ways using the beige filter row found at the top of the grid. First users will need to move their cursor in to the filter row in the field they wish to filter by and then enter the filter value. Alternatively, the filter field can be used as a dropdown menu to select a specific value found in the selected field. Once the filter is set, move the cursor out of the field by pressing Tab or clicking elsewhere on the form to apply the filter.
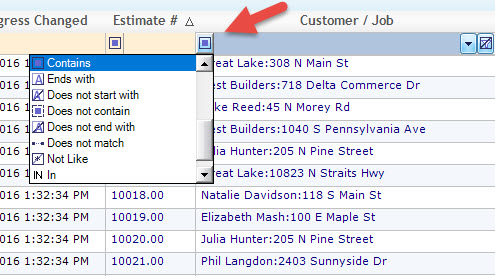
By default, the filter type is set to “Contains” and will filter out any entries that do not contain the value specified in the filter field. Users can select other filtering options by clicking the icon to the left of the filter field. The filter options are: “equals”, “does not equal”, “less than”, “less than or equal to”, “greater than”, “greater than or equal to”, “like”, “matches regular expression”, “starts with”, “contains”, “ends with”, “does not start with”, “does not contain”, “does not end with”, “not like”, “in”, and “not in”.
Grouping Entries
Entries can be grouped by a field value by simply clicking on the title of the field the user wishes to group by, then dragging the title to the light-blue Group By section at the top of the form. Entries with the same value in the selected field will then be displayed as groups, and each group can be expanded by clicking the “+” displayed next to the value. Additional subgrouping can be applied by dragging additional field titles to the light-blue Group By section at the top of the form and releasing them. The hierarchy of the grouping will be determined by the order in which the field titles are added to the Group By section.
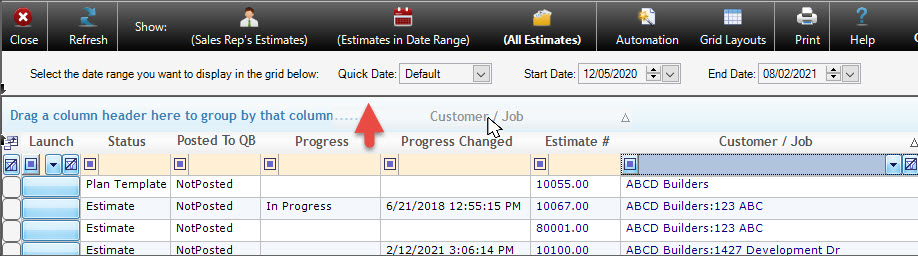
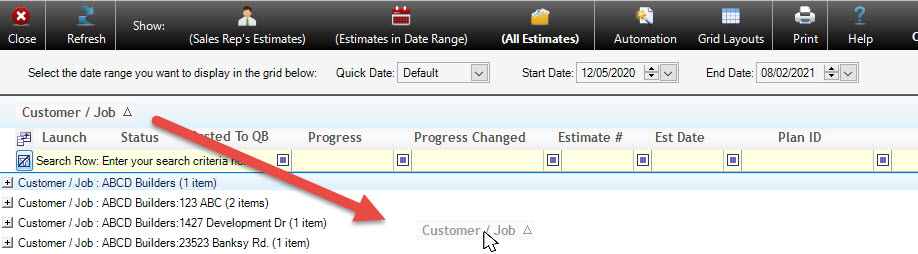
To remove the grouping, click on it in the Group By section, drag it down into the grid and release it, as pictured below.
Changing Field Widths
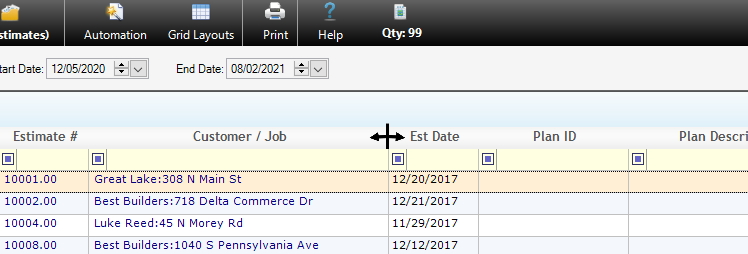
Users can widen fields to eliminate text wrapping or display entries that are truncated due to field width. The width of fields in the grid can be modified by clicking on the margin of the field title and dragging it to the left or right.
Changing Field Order
Users can change the order fields are displayed in by clicking the field title and dragging it to the left or right of its original position. When the field reaches the desired position, simply release it.
Changing Field Titles
Uses can change field titles by simply double-clicking on the field title text. After double clicking, the field title text will be highlighted, simply start typing to enter the new field title.
Saving Grid Customizations
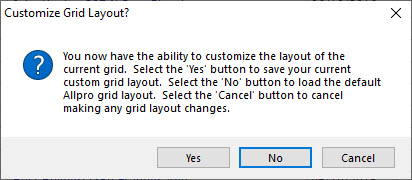
Users can save the current grid layout, including and alteration, by pressing F1 and selecting “Yes” from the dialogue box that opens. Pressing F1 and selecting “No” from the dialogue box will restore the original grid layout. Selecting “Cancel” form the dialogue box will make no changes.
Some forms include a Grid Layouts option on their main menu that allows users to save and load multiple customized grid layouts. When using this menu, users will not need to press F1 to save their customized layout.
