The User Preferences Form
About User Preferences

The User Preferences form in Allpro Insulator allows you to enter information about the software user, set default preferences, manage user interface options, manage email templates, email settings, and manage PDF attachments for the user. User Preferences can be accessed when creating a new software user, editing an existing software user, or from the Preferences icon on the main toolbar. On this page we’ll cover each field and function found in User Preferences.
- When creating or editing a user, the displayed User Preferences will be for that user. If accessing (User) Preferences from the main toolbar, they will be for the user that is currently logged in to Allpro Insulator.
- While not true in all cases, users will generally need to close the program and reopen it before changes made to User Preferences take effect.
The Preferences form has 5 tabs: Preferences, Customize Menu, Email Templates, Sales Reps Signature, and User Attachments. We’ll cover each tab from left to right, or you can click the links below to skip to a particular section.

User Preferences by Tab
| User Attachments |

User Preferences – Preferences
The first tab found in User Preferences contains a list of default options and settings pertaining to the software user. This includes everything from the user’s contact info to how forms are loaded when they open. In all, there are upwards of 60 User Preferences, though not all will necessarily apply to any given user. Users can click Display by Group Name or use the search row at the top of the preferences grid to help them locate the entries they are looking for.

There are 7 Preference Groups: Calendar, Default, Email, Layout, Option, QuickBooks, and Setting. To simplify, we’ll cover the Preferences in order by Group Name, or you can click the links below to skip to a particular section.
Preference Groups
| Calendar | Default |
| Layout/Theme | |
| Option | QuickBooks |
| Setting |
Preference Group: Calendar
These settings relate to SchedulePro, Allpro Insulator’s built-in calendar and scheduling system.

Default Calendar View – Determines the default view for SchedulePro: Day, 5D Week, 7D Week, Week, Month, Timeline, Gantt, or Agenda
Default Calendar Grouping – Determines what grouping is applied to appointments in SchedulePro: None, Date, or Resource.
Default Calendar Resources – Determines what Calendar Resource is loaded by default in SchedulePro, with the option to view all resources or select an individual Calendar Resource.
Calendar Display Fields – Opens a small pane from which users can select which fields to display on appointments: Crew, Package ID, Equipment ID, and/or Crew Edition User.
Calendar Skin – Determines what color the SchedulePro user interface is, users can select from a list of color options.
Disable User Calendar – Determines whether the current software user has an associated calendar/calendar resource.
Preference Group: Default
These settings determine how filters are applied, how certain forms or reports behave, and any default values for new jobs.

Default Estimate Report – Allows the user to specify which Estimate report will be accessed from the ES button on the Estimate form’s toolbar.
Default Job Sheet – Allows the user to specify which Job Sheet report will be accessed from JS button the Estimate form’s toolbar.
Default Cost Sheet Report – Allows the user to specify which Costing report will be accessed from the CS button on the Estimate forms toolbar.
Default Estimate Load – Determines what type of filtering is applied to the Estimate List by default: Sales Rep’s Estimates, Date Range Estimates, or All Estimates
Default Package List Load – Determines what type of filtering is applied to the Package List: Sales Rep’s Estimates, Date Range Estimates, or All Estimates.
Default Customer List Load – Determines what type of filtering is applied to the Customer List: Customers & Jobs, Customers, Jobs, All Prospects, Sales Rep’s Prospects, or All Including Closed.
Default Terms – Allows the user to specify the default terms that will be assigned when creating new Jobs.
Default Job Type – Allows the user to specify which Job Type is selected by default for new Jobs.
Report Export Path – Allows the user to specify a default location for exported reports to be saved, such as Documents.
Report Action – Determines which Document Action is selected by default in the Report Master, as well as what action is performed when accessing the default Estimate, Job and Costing sheets using the ES, JS, and CS buttons on the Estimate form.
Document Add Status – Determines if new documents will be saved to the Documents form, and whether they will replace an existing version there.
Default Email Schedule Template – Allows the user to specify a default template for use with DSign and automated DSign follow-up messages. The templates are managed under Email Automation > Email Schedule Templates.
Default Dashboard Recent Estimate Load– Allows the user to specify filtering options for the User Dashboard
Dashboard Chart Previous Days – Determines how many previous days are used for User Dashboard data.
Default Time Sheet Entry – Determines how Time Sheet entries will be entered in the Time Sheet form and Payroll Splits: Standard, Manual Duration Entry, or Full Manual Entry.
Default Call Load – Determines how the list of calls on the Follow-up Calls form is sorted: User’s Calls, All Calls, or All Plus Closed.
Include Job Pictures on Estimates – Along with Job Pictures Online image settings, determines if Job Pictures online are included on produced Estimates.
Include Job Pictures on Invoices – Along with Job Pictures Online image settings, determines if Job Pictures Online are included on produced Invoices.
Include Job Pictures on Job Sheets – Along with Job Pictures Online image settings, determines if Job Pictures Online are included on produced Job Sheets.
Pictures Download Path – Determines where Job Pictures online will be saved when downloaded.
Preference Group: Email
This preferences group allows you to configure the Software User’s email contact information and outgoing email settings.

Select Common Email Provider – Allows the user to select from among a number of common public email service providers and have their SMTP mail settings entered for you.
SMTP Authentication – Allows the user to specify the authentication protocol is used by their SMTP mail service provider.
SMTP Server – Allows the user to configure the outgoing SMTP server for their SMTP mail service provider or users can select -Use Microsoft Outlook- to email from Microsoft Outlook instead of using SMTP mail.
SMTP Port – Allows the user to specify the port used by their SMTP email service provider.
Email – Allows the user to enter their email contact information and is also used as the username for SMTP email services.
Preference Group: Layout/Theme
This preference group allows you to configure the way the program is laid out by default when it opens, including support for dual monitors.

Form Explorer Layout (General) – Allows the user to specify how text and icons in the General section of the Form Explorer will appear; found at the top left of the program.
Form Explorer Layout (Setup) – Allows the user to specify how icons and text in the Setup section of the form explorer will appear; found on the lower left of the program.
Color Scheme – Allows the user to select the color scheme of the Allpro Insulator user interface from a list of options.
Layout Main Screen – Allows the user to configure the layout of the user interface for full screen and dual monitors.
Layout – Estimates Form – Allows the user to configure the appearance of the row of tabs found along the bottom of the Estimate Form.
Layout – Payroll Splits – Allows the user to configure whether Payroll Splits opens in single or dual monitor layout.
Dashboard Skin – Allows the user to select the Dashboard color scheme from a list of options.
Preference Group: Option
This preference group allows the user to configure the behavior of a number of features throughout the program.

Hide Est/Inv Subtotal by Default – Allows the user to specify whether the Subtotal should be listed on produced estimates and invoices.
User Customer Sales Rep – Determines whether the Software User’s Sales Rep or the customer’s default Sales Rep is selected when creating Estimates for the customer.
Use Billing Email – Determines whether email sent to the customer will be sent to their primary email contact or specified billing email contact.
Hide Not Awarded Lineitems – Determines whether line items that are part of a Package with the status of “Not Awarded” are displayed in the Full Details grid of the Estimate form.
Auto Add Additional Attachments – Determines whether Spec Sheets and other attachments are included automatically when emailing Estimates and Invoices to customers.
Revision Date – Determines whether revisions to an estimate will keep the existing Estimate Date or set it to the date of the revision (current date).
Warn When Form Is Already Open – Determine whether the user will be warned if they open a new instance of a form they have open already, such as opening Company Setup twice.
Filter Zip Code List States – Allows the user to specify for which states’ Zip Code data will be available when entering address information.
Help Bar Display Type – Determines how large the inline help bar found at the bottom of the program is or if it should be hidden.
Show Low Inventory Warning – Determines whether the user will be notified when inventory balances fall below specified thresholds, part of Product Inventory.
View Videos In Training Portal – Allows the user to specify whether training videos opened from inline help will be viewed in the online Training Portal.
Preference Group: QuickBooks
This preference group allows the user to configure default behavior when sending information to QuickBooks by checking various options automatically. Standalone Edition users can skip ahead Preference Group: Setting.

Send Revenue Estimate to QB – Determines whether a Revenue Estimate will be sent to QuickBooks when the record is sent.
Send Inventory Estimate to QB – Determines whether an Inventory Estimate is sent to QuickBooks when the record I sent.
Send Labor Estimate to QB – Determines whether labor costing information will be sent to QuickBooks when the record is sent.
Do Not Update Customer in QB – Determines whether customer information updated in Allpro Insulator will be sent to QuickBooks.
Do Not Send Package Labels to QB – Determines whether package labels are sent when sending Estimates or Invoices to QuickBooks.
Only Send Revenue Summaries to QB – Determines whether revenue summaries are sent to QuickBooks.
Preference Group: Setting
This preference group serves as something of a catchall for preferences that don’t fall neatly into a broader category.

Phone – Allows the user to specify a phone number to associate with their Software User. This number will not appear on Estimates or Invoices but will be used for any Allpro Alerts SMS text notification sent to “user”.
Directions Start Address – Sets the starting location for driving directions generated from the Job Sheet tab of the Estimate form and elsewhere.
Training Portal Key – This “API key” allows you to log into the Training Portal seamlessly to watch videos from help links in Allpro Insulator. Typically, this value will be set for you by Allpro, please contact support at (231) 839-7928 for help if it has not.
Remember that many changes to User Preferences will not take place until the software user closes Allpro Insulator, reopens it, and logs back in.

User Preferences – Customize Menu
The Form Explorer and Main Toolbar in Allpro Insulator provide easy access to all of the features and functions in Allpro Insulator, but there are sometimes items that a user shouldn’t have access to or just doesn’t use. The Customize menu lets you eliminate the icons used to access Allpro Insulator’s forms and features, whether cleaning things up or locking them. We’ll go over the options based on where the menu items are found: the main toolbar, the General section of the Form Explorer, and the Setup Section of the Form Explorer
After making changes to the items to be displayed in menus, users will need click Save Changes, then click the Layout Mode icon in the main Toolbar menu and select Refresh to apply them. Alternatively, the change will appear the next time the program is closed and re-opened.
- To effectively “lock” access by eliminating menu items, you will need to ensure the user does not still have access to User Preferences. This can be accomplished from Software Users > Edit User Permissions.
The Main Toolbar
The main toolbar in Allpro Insulator runs along the top of the program, just below the title bar. Not all items found on the Toolbar can be hidden.
Tasks – The tasks function allows users to create and track tasks, uncheck the box below it to hide this Toolbar menu item.
Explorer – The Explorer icon toggles the Form Explorer open and closed. Found along the left side of the program, it’s broken into sections called General and Setup. Uncheck the box below it to hide this Toolbar menu item.
Dashboard – This Dashboard icon opens the User Dashboard, a graphical breakdown of recent sales and estimating activities. Uncheck the box below it to hide this Toolbar menu item.
Quick Find – This menu item accesses the Quick Find function, allowing the user to quickly locate and access customers, jobs, and estimates in Allpro Insulator. Uncheck the box below it to hide this Toolbar menu item.
New Windows – Clicking the New Window icon, then clicking on a form in the Form Explorer will open form in a new window instead of as a tab in Allpro Insulator. Uncheck the box below it to hide this Toolbar menu item.
Calculator – The Calculator ion opens a working calculator in Allpro Insulator so user can do quick calculations when needed. Uncheck the box below it to hide the Toolbar menu item.
Create Email – Opens a new email dialogue and allows you to select from any contacts you’ve entered in Allpro Insulator with the option to insert an Email Template. Uncheck the box below it to hide this Toolbar menu item.
Form Explorer – General
The general section of the form explorer, found near the top left of Allpro Insulator, provides access to the most common forms needed for day-to-day operations and estimating.
Estimate Wizard – Opens the Estimate Wizard and walks you through creating a new estimate. Uncheck the box to the left of it to hide this Explorer menu item.
Estimate – Opens the Estimate form, though users may still need to select a record to view. Uncheck the box to the left of it to hide this Explorer menu item.
Progress Explorer – Opens the Progress Explorer, a visual dashboard of Estimate Progress information. Uncheck the box to the left of it to hide the Explorer menu item.
Package List – Opens the Package List form, which displays a list of all packages that have been added to Estimates. Uncheck the box to the left of it to hide this Explorer menu item.
Line Item List – Opens the Line Item List, which displays a list of all line items that have been added to estimates. Uncheck the box to the left of it to hide this explorer menu item.
Documents – Opens the Documents for, which can be used to store and sync documents in PDF, XLSX and DOCX formats. Uncheck the box to the left of it to hide this Explorer menu item.
Customers – Opens the Customer form to the last entry alphabetically. Uncheck the box to the left of it to hide this Explorer menu item.
Customer List – Opens a list of customer and jobs that have been created in Allpro Insulator. Uncheck the box to the left of it to hide this Explorer menu item.
DSignature List – Opens a list of DSign records and allows users to manage them or review their status. Uncheck the box to the left of it to hide this Explorer menu item.
Product Inventory – Opens the Product Inventory form, from which inventory levels can be viewed and new inventory can be added. Uncheck the box to the left of it to hide this Explorer menu item.
Time Sheet – Opens the Time Sheet form, where time sheet data can be reviewed or entered. Uncheck the box to the left of it to hide this Explorer menu item.
SchedulePro – Opens the SchedulePro calendar where users can view and manage the schedule. Uncheck the box to its left to hide this Explorer menu item.
Scheduled Jobs – Opens the Scheduled Jobs form, displaying a list of jobs that have been scheduled in SchedulePro. Uncheck the box to the left of it to hide this Explorer menu item.
Load Sheets – Opens the Load Sheets feature, allowing you to manage vehicle inventory. Uncheck the box to the left of it to hide this Explorer menu item.
Allpro SiteMaps – Opens the Allpro SiteMaps feature, allowing user to view customer and job location information overlayed on a map. Uncheck the box to its left to hide this Explorer menu item.
A/R Center – Opens the A/R Center, displaying a list of invoiced jobs, payments, and aging information. Uncheck the box to its left to hide this Explorer menu item.
Form Explorer – Setup
The Setup section of the Form Explorer contains administrative functions related to setup, software users, materials, data entry, and the configuration of features. It is recommended that software users’ access to the menu items found in setup be restricted unless they require access to do their job.
Company Setup – Allows users to enter company information, set companywide setting and options, and add a company logo. For QuickBooks users, this is also where QuickBooks integration is configured. Uncheck the box to the left of it to hide this Explorer menu item.
Software Users – Allows users to manage logins for Allpro Insulator and configure user permissions and preferences. Uncheck the box to the left of it to hide this Explorer menu item.
Manufacturers – Allows users to manage optional information on the manufacturers of the company’s insulation materials. Uncheck the box to the left of it to hide this Explorer menu item.
Suppliers – Allows users to manage optional information on the company’s suppliers. Uncheck the box to the left of it to hide this Explorer menu item.
Architects – Allows users to enter optional information on architects the company works with. Uncheck the box to the left of it to hide this Explorer menu item.
Product Details – Allows users to manage the products the company purchases from vendors, a required part of the initial setup. Uncheck the box to the left of it to hide this Explorer menu item.
Item Builder – Helps users generate new Item Details entries from their Product Details entries. Uncheck the box to the left of it to hide this Explorer menu item.
Item Details – Allows users to manage the line items used to build estimates, including details about pricing and cost. Uncheck the box to the left of it to hide this Explorer menu item.
% Percentages – Allows users to manage percentage-based calculations for estimates and invoices, such as sales tax or commission. Uncheck the box to the left of it to hide this Explorer menu item.
Sales Reps – Allows user to manage the Sales Reps at their company, important for setting up estimators in the program. Uncheck the box to the left of it to hide this Explorer menu item.
Employees – Allows users to enter employee information for payroll, scheduling, and other purposes. Uncheck the box to the left of it to hide this Explorer menu item.
Equipment – Part of the Advanced Features Module, allows users to manage vehicles for scheduling and vehicle inventory. Uncheck the box to the left of it to hide this Explorer menu item.
Allpro Alerts – Allows users to configure automated internal messages, email, and SMS text alerts triggered by various activities in the software. Uncheck the box to the left of it to hide this Explorer menu item.
Email Automation – Allows users to manage Email Automation and DSign templates and view a log of DSign messages sent. Uncheck the box to the left of it to hide this Explorer menu item.
Remember to apply the changes by clicking Save Changes, then clicking the Layout Mode icon in the main Toolbar menu and selecting Refresh. Alternatively, the changes will appear the next time the program is closed and re-opened.

User Preferences – Email Templates
Email Templates can be found on the third tab from the left on the User Preferences form and allows users to create and share time-saving email templates. User can add Data Tags to their templates which will be replaced by specific customer and job information when the message is sent. Email templates work with both direct mail and Microsoft Outlook and can be shared by checking the Accessible By All checkbox.
- Note that DSign email message templates and DSign automated follow-up templates are configured under Email Automation, click here for help with DSign email templates.
Message Name – Allows the user to enter a name for their email template, the first step in creating a new template
Alternate Email Address – Allows the user to specify an additional email address that should always receive the message when it is sent.
Sort – Allows users to specify the order of Email Templates in the list.
Accessible By All – Checkbox determines whether the Email Template will be accessible by other users or only the current user.
Active – Checkbox determines whether the email template currently appears in the list of selectable messages.
Date/Time Created – Indicates when the template was created
Created By – Indicates which software user created the template.
Date/Time Update – Indicates when the template was last modified.
Updated By – Indicates which software user last modified the email template.
Email Message Subject – Allows user to enter the subject for their Email Template. The Blue Insert Data Tags link can be used to insert customer and job information, and the “ABC” button to the left of the field will perform a spellcheck.
Email Message Body – Allows user to enter the body for their Email Template. The Blue Insert Data Tags link can be used to insert customer and job information, and the “ABC” button to the left of the field will perform a spellcheck.
Once you’ve finished configuring your email templates, they can be found in the Select Email Template dropdown in email dialogues throughout Allpro Insulator. Templates with Accessible By All checked will appear to all users as a template option.
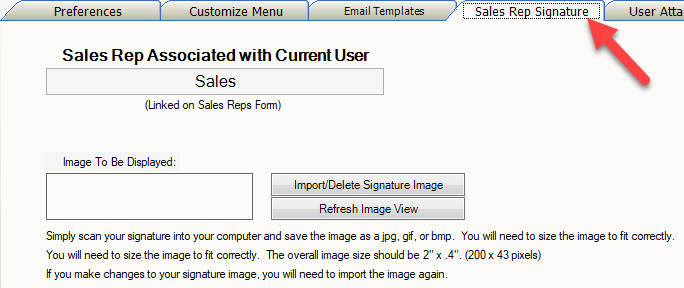
User Preferences – Sales Rep Signature
The sales Rep Signature tab allows you to import an image of a sales rep’s signature and add it to produced (printed/emailed/exported) estimates. The image should be roughly 2” by 4” or 200 pixels by 43 pixels to avoid distortion. The name of the associated Sales Rep will be displayed under Sales Rep Associated with Current User
Import/Delete Signature Image – Opens a dialogue from which users can select an image to import or delete the current image.
Refresh Image View – Refreshes the Image to be displayed.
User Preferences – User Attachments

Whether contracts or material safety data sheets, software users may find they need to include additional attachments when producing documents for customers. User can add PDF documents directly to the database, then select which attachments needs to be produced along with the estimate, invoice, or other report. The attachments are stored right in the database, so there’s no need to chase them around with DropBox or OneDrive.
Document Title – Allows the user to assign a name to the attachment.
Document Comments – Allows users to add a brief internal note to the document’s entry in User Attachments.
Browse – Allows the user to select the desired PDF files to add as an attachment.
Document File Name – Displays the name of the selected file.
Date/Time File Uploaded – Displays the date and time that the attachment was imported.
Date/Time Created – Displays the date and time that the attachment entry was created.
Created By – Displays the software username of the user who created the attachment.
Date/time Updated – Displays the date and time that the attachment was last modified.
Updated By – Displays the software username of the user that last modified the attachment.
For More Help…
If you still have questions or would like some one-on-one training for User Preferences, contact Allpro Technology software support at Support@AllproTechnology.com or by calling (231) 839-7928.