Using DSign
DSign is an optional Allpro Insulator module that allows users to submit proposals to their customers via email for digital approval. The proposals are sent directly from the estimate form and can be tracked or managed on the DSignature List form in Allpro Insulator.
Digitally accepted proposals are legally binding, and users receive near-instantaneous email notification when a proposal is accepted or rejected. Optional, automated follow-up messages help ensure proposals won’t sit forgotten in an email inbox.
- An active Allpro Cloud Services package and DSign licensing are required to use the DSign function. For questions regarding licensing, please call Allpro technology at (231) 839-7928 or email Info@AllproTechnology.com
- Email settings and contact information found in User Preferences and the Sales Reps form must be completed for DSign to function properly.
- If using Microsoft Outlook for outgoing email, ensure the 64-bit version of Microsoft Office is installed. If you have questions about 64-bit Microsoft Office applications, please call support at (231) 839-7928 or email Support@AllproTechnology.com.
This help page will outline how to generate and send a DSign Proposal.
DSign Options
Users can configure several options for DSign proposals from the DSign Comments tab in Company Setup. This includes DSign Agreement (terms), Accepted and Rejected Comments, and whether to present the customer with the option of selecting a preferred start date for the proposed work or a counter bid field.

Sending DSign Proposals
DSign proposals are generated from the Estimate form or Report Master (E). Note that users should create any desired Email Automation Templates prior to sending DSign Proposals. For more information on Email Automation Templates, click here.
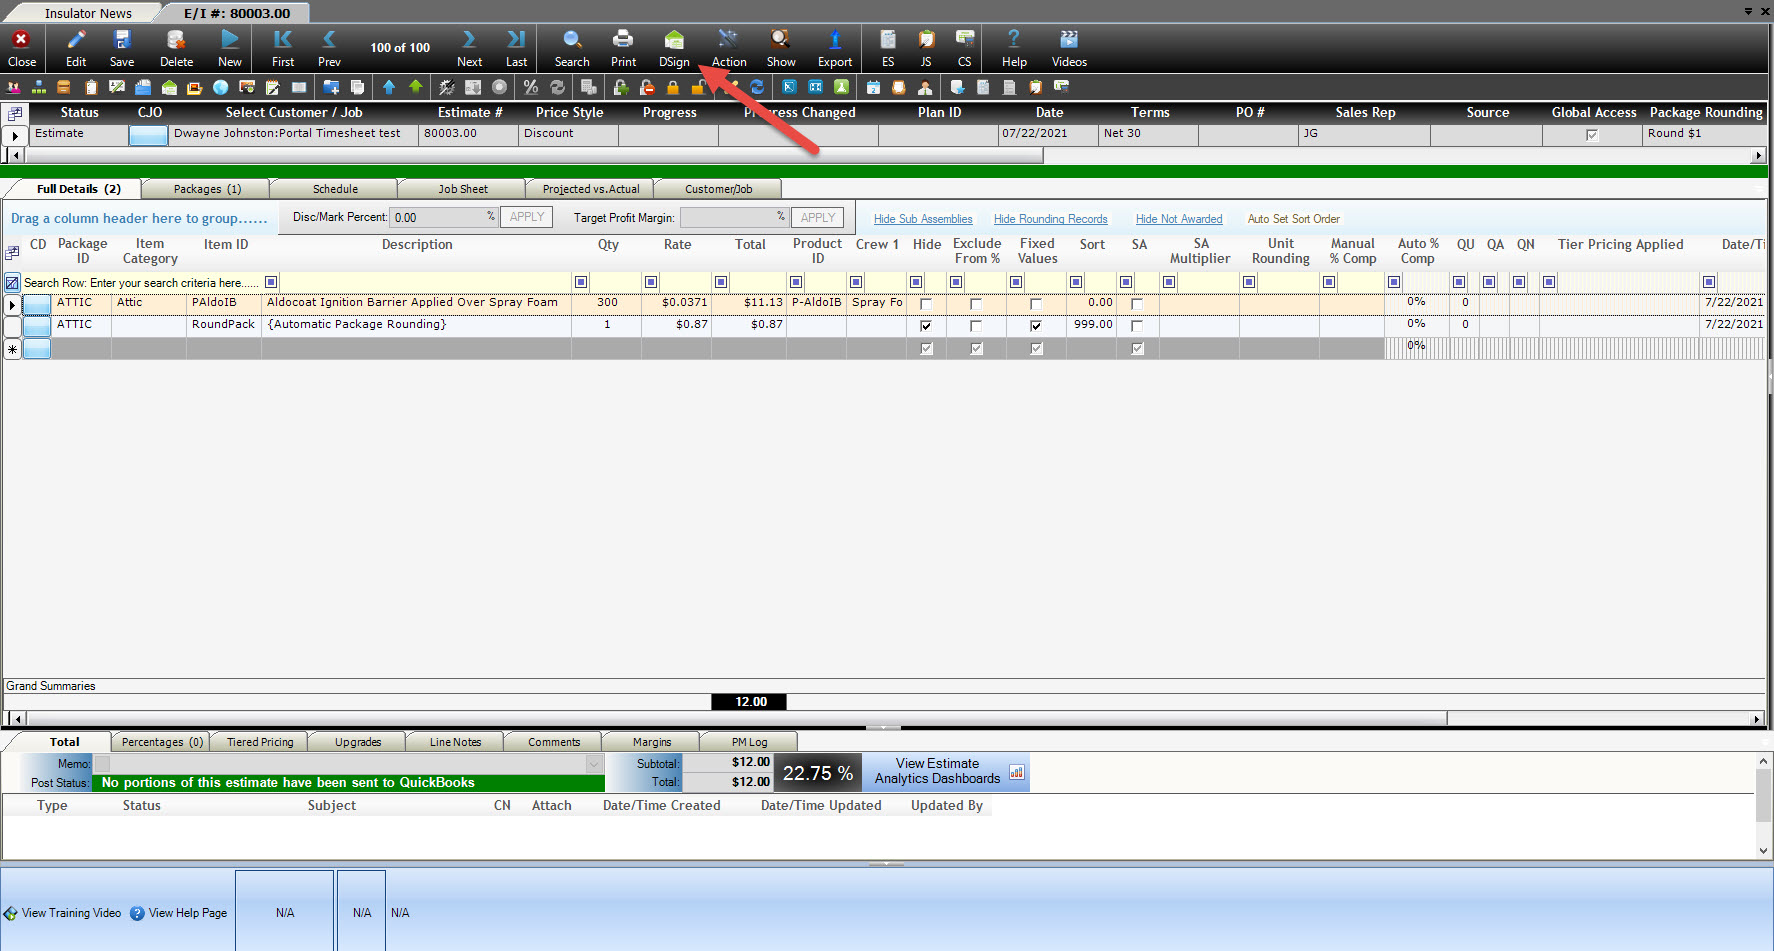
- Create the DSign Proposal – Once the estimate is complete, users can create the DSign proposal by clicking the DSign icon, located near the center of main menu bar on the Estimate form, as pictured below.
- Create the Estimate – The first step in creating a DSign proposal is generating an estimate. This process is no different from generating a normal estimate, and users can include both Optional Packages and Line Item Upgrades if desired. Customers will be able to select the options they want from the online DSign proposal during approval.
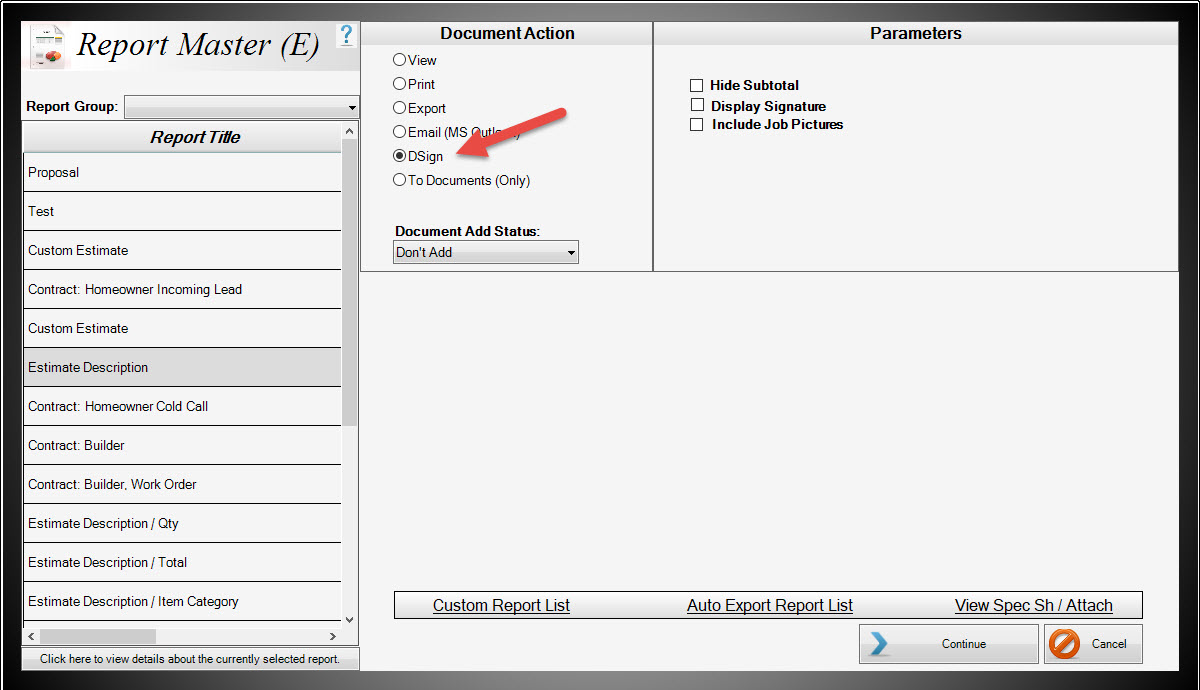
- Create the DSign Proposal – Once the estimate is complete, users can create the DSign proposal by clicking the DSign icon, located near the center of main menu bar on the Estimate form, as pictured below. Note that a DSign proposal can also be created directly from Report Master (E) by selecting DSign from the Document Action section. For help with Report Master (E), click here.
- Select an Estimate Report – After Clicking the DSign Icon, Report Master (E) will open allowing users to select which Estimate report they would like to use. While the DSign proposal will include all portions of the estimate, a viewable copy of the estimate is included on the DSign proposal page and can be attached as a PDF to the initial DSign message using the selected Estimate Report.
- Click Continue – After selecting the desired report, click continue to finish configuring your DSign proposal. Select or enter the email address to which the DSign proposal will be sent, and either select a template or compose your message in the email editor.
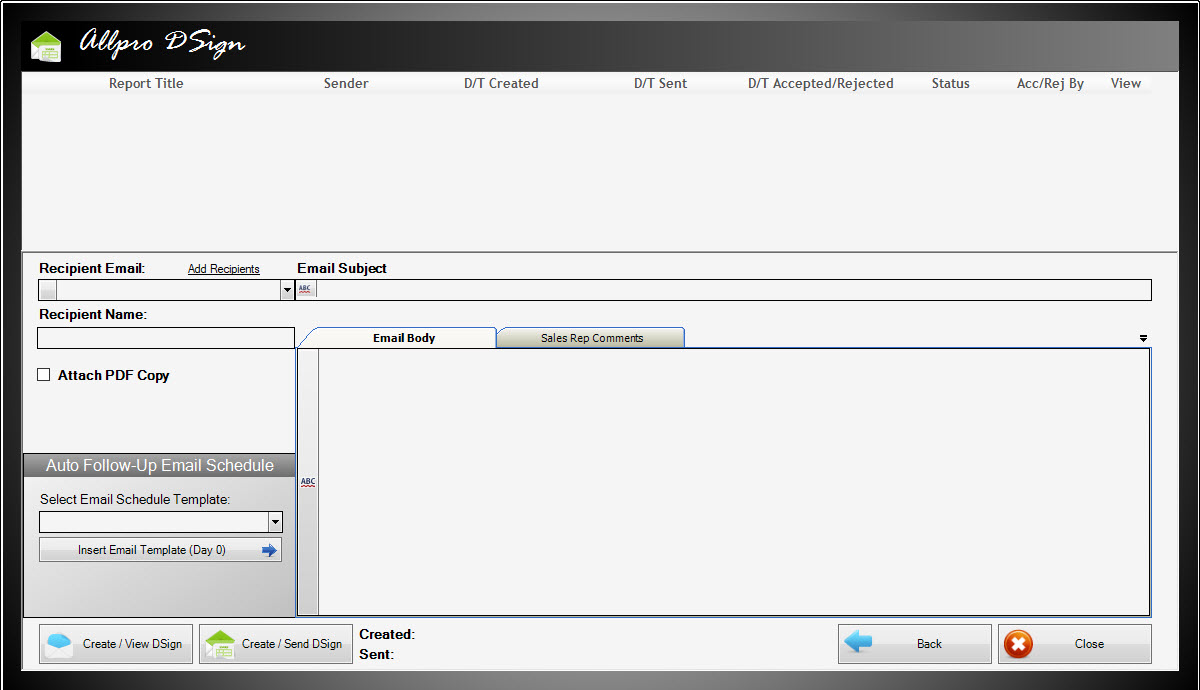
Recipient Email – Allows the user to select the DSign recipient’s email address from customer contact information or enter an email address manually.
Email Subject – Allows the user to enter a subject for the DSign email message, and a spell check can be performed by clicking the button to the left of the field. This field will be populated automatically when a template with an email subject line is used. For more help with Email Schedule Templates, click here.
Recipient Name – Displays the name of the mail recipient from customer contact information or will display the email address of the recipient if one is manually entered.
Attach PDF Copy – Determines if a PDF copy of the Estimate or Invoice will be attached to the DSign email message generated from the DSign dialogue.
Email Body – Allows the user to enter the desired body text of the DSign email message. This field will be populated automatically when a template with email body text is used. A spell check can be performed by clicking the button to the left of the field. For more help with Email Schedule Templates, click here
Select Email Schedule Template – Allows the user to select which Email Message Template will be used for the DSign proposal. If an Email Schedule Template Message entry has been created with a “Send-On Day” day of 0, it will be used as the template for the DSign email message. The Email Schedule Template selected will also determine the schedule and content of any automated follow-up messages. Users will be given the opportunity to select rather or not to send any follow-up messages when they create and send the initial DSign proposal email. For help with Email Schedule Templates, click here.
- Click Create/View DSign or Create/Send DSign – After composing your DSign email message, click Create/Send DSign to generate the email message and DSign record, or click Create/View DSign to create the DSign record, then manage it later from the DSignature List.
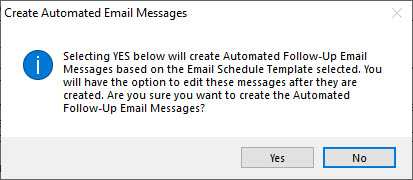
- Select Rather or not to Send automated Follow-up – After clicking Create/Send, users will be prompted to select whether to schedule any follow-up messages included in the selected Email Schedule Template. Clicking “Yes” will schedule follow-up messages as specified in the Email Schedule Template, clicking “No” will stop the follow-up messages from being created. If the customer accepts or rejects the proposal, any scheduled follow-up messages will be cancelled automatically. For more help with Email Schedule Templates, click here.
Note that new DSign records will not appear in the DSignature List until the next synchronization of data with the cloud through Allpro Cloud Services. This process normally occurs automatically roughly every 15 minutes. Users will need to click “Refresh” on the DSignature List form to see new data.
After creating and sending the DSign proposal, a post back summary will be displayed in upper part of the DSign dialogue, as pictured below.
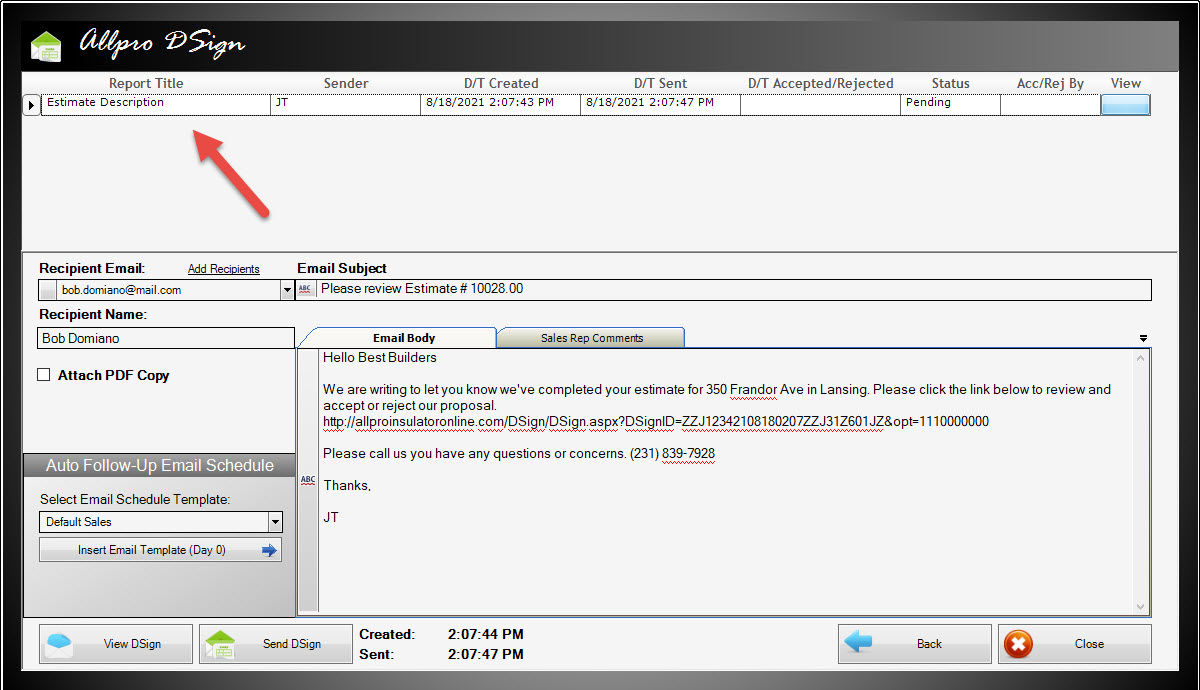
Report Title – Displays the title of the report selected from Report Master (E) when creating the DSign proposal
Sender – Displays the software user that sent the proposal,
D/T Created and D/T Sent – Display the timestamps for the creation and sending of the proposal.
D/T Accepted/Rejected – Logs the date and time when the customer takes action on the proposal.
Status – Displays the current status of the DSign proposal: “Pending”, “Accepted”, or “Rejected”.
Acc/Rej By – Displays the name entered when proposal is accepted or rejected.
View – The light-blue button in this field will open the DSign link in a web browser for the user to review.
- Note that text from the DSign email message and settings will remain visible in the dialogue after the message is sent.
The DSign Proposal
The DSign Proposal is a web page that can be viewed on both desktop computers or mobile devices and is presented to the customer as a link in an email message. Clicking the link opens the corresponding DSign proposal web page and allows users to select options before accepting or rejecting the entire proposal. An example of the DSign proposal is found below:
