Report Master E
v14
The Report Master (E) form allows users to access Estimate reports and reports that relate to Estimates. That includes Invoices, Job Sheets and Costing Sheets.
The configuration options vary somewhat depending on the Report Group being accessed and the Action Type that is selected. Options related to Action Type are described along with the Action Type. Options based on the Report Group, called Parameters, are described after the Action Type portion of this help page. Additional functions found on this Report Master dialogue are described in the last section, after Parameters.
Regardless of which Document Action or Report Group is selected, the button marked (Stay Here) will leave the Report Master dialogue open so users can continue working with other actions or reports, while the button marked (Finished) will close the Report Master after performing the selected Document Action.
Select a link below to skip to a specific topic.
| Document Actions | Report Parameters | User Report List |

Document Actions
View – Allows the user to view reports in Allpro Insulator’s report viewer.
- Users can export or print documents from the report viewer. For more information on the Report Viewer, click Here.
Print – Sends the selected report to the default printer selected in Windows.
- Errors may occur if the selected paper or paper size for the printer is not Letter (8.5”x11”)
Export – Exports the report as a PDF file to the location specified in the Export Path field.
Export Options –Displays information about the format the report will be exported in, what the file will be called, and the location that the file will be saved in when exported.
- Export Format – While PDF format is standard, users can opt to export reports in CSV, HTML, RTF, TXT, and XLS (Excel) formats.
- File Name – Displays the name the file will be given when exported. Users can modify the name if desired.
- Export Path – Displays the location on the local computer the report will be exported to.
- Open Exported File – Checking the Open Exported File checkbox will open the PDF document after it is exported.
Email (Direct) – Allows the user to enter email message in the built-in email editor and sends it directly from the program using SMTP protocols.
- Not all email service providers allow email to be sent from external “3rd party” applications like Allpro Insulator, or may require additional configuration in order to do so. Contact the user’s email service provider for further details.
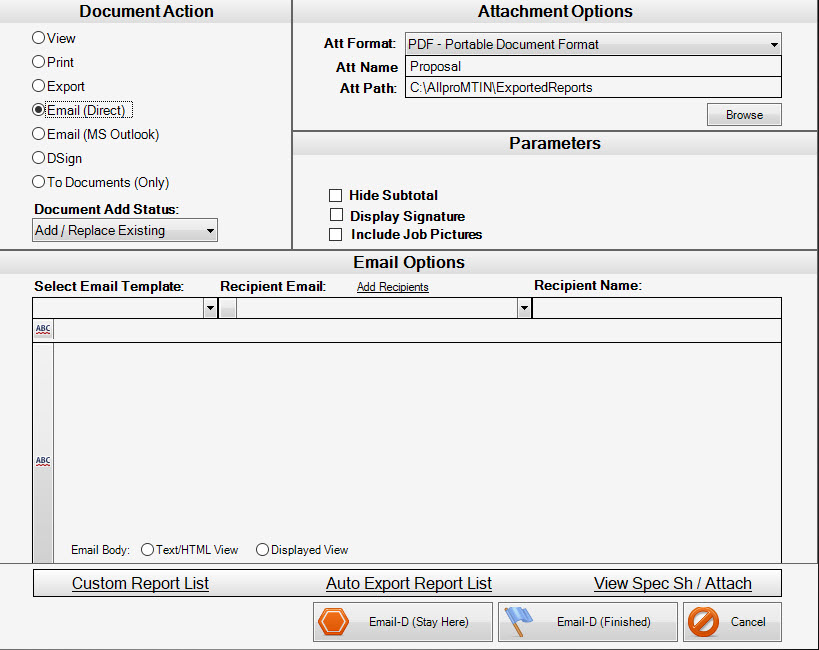
Attachment Options – This section displays information about the format the email attachment will be exported in, what it will be called, and the location that the file will be saved in when exported.
- Att Format – While PDF format is standard, users can opt to export email attachments in CSV, HTML, RTF, TXT, and XLS (Excel) formats.
- Att Name – Displays the name the attachment will be given when exported. Users can modify the name if desired.
- Att Path – Displays the location on the local computer that the attachment will be exported to. Users can click the “Browse” button to choose a different location.
Email Options – This section is used to compose the email message.
- Select Email Template – Allows users to select an Email Template if Email Templates have been configured.
- Recipient Email Address – Used to enter the customer or prospect’s email address, or select a contact address associated with the customer (if contact information has been entered).
- Recipient Name – Displays the name of the contact associated with the customer email address, or displays the email address if an address is entered manually.
- Email Subject – The field below template and email address options is used to enter a subject for the email message. The “ABC” button to the left of the field will perform a spell check.
- Email Body – The large field below the subject allows users to compose the email body text. The “ABC” button to the left of the field will perform a spell check.
Email (MS Outlook) – Creates a new email in MS Outlook and attaches a PDF copy of the report to the email. Users can compose their email in the Report Master or in the new Microsoft Outlook message generated by the report master.
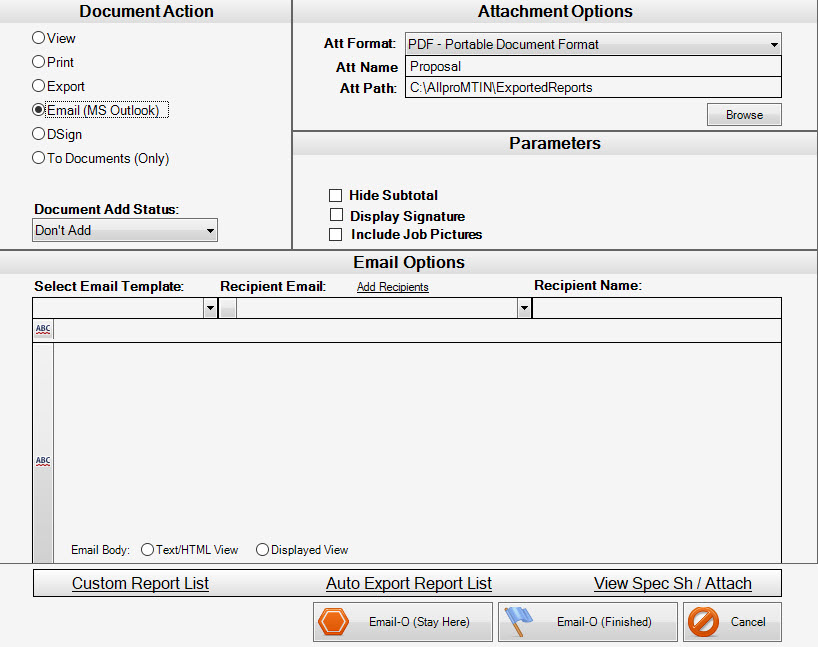
Attachment Options – This section displays information about the format the email attachment will be exported in, what it will be called, and the location that the file will be saved in when exported.
- Att Format – While PDF format is standard, users can opt to export email attachments in CSV, HTML, RTF, TXT, and XLS (Excel) formats.
- Att Name – Displays the name the attachement will be given when exported. Users can modify the name if desired.
- Att Path – Displays the location on the local computer that the attachment will be exported to. Users can click the “Browse” button to select a different location.
Email Options – This section is used to compose the email message. Users can also opt to compose the message in Microsoft Outlook.
- Select Email Template – Allows users to select an Email Template if Email Templates have been configured. The template will be inserted in the Microsoft Outlook message.
- Recipient Email Address – Used to enter the customer or prospect’s email address, or select a contact address associated with the customer (if contact information has been entered), and will be entered in the “To” field of the Microsoft Outlook message. Clicking Add Recipients allows the user to add more than one recipient.
- Recipient Name – Displays the name of the contact associated with the customer email address, or displays the email address if an address is entered manually.
- Email Subject – The field below template and email address options is used to enter a subject for the email message. The “ABC” button to the left of the field will perform a spell check. Text entered here will appear in the Subject line of the new Microsoft Outlook message.
- Email Body – The large field below the subject allows users to compose the email body text. The “ABC” button to the left of the field will perform a spell check. This text will be inserted in the Body section of the new Microsoft Outlook email message.
Dsign – Generates a DSign proposal for the Estimate or Invoice. For information on sending DSign proposals, click Here. DSign is only used for Estimates and Invoices.
- DSign is an optional digital signature service and requires and active Allpro Cloud Services subscription. For more information on DSign licensing click Here or call Allpro Technology support at (231) 839-7928.
To Documents (Only) – Use this Document Action to add the selected report to the Document Table in the Allpro Insulator database. (Allpro Insulator v13 and later)
- Document Add Status – When storing a report in the Allpro Insulator Documents table, this dropdown menu determines if the document will replace an existing copy or be added as a separate document.
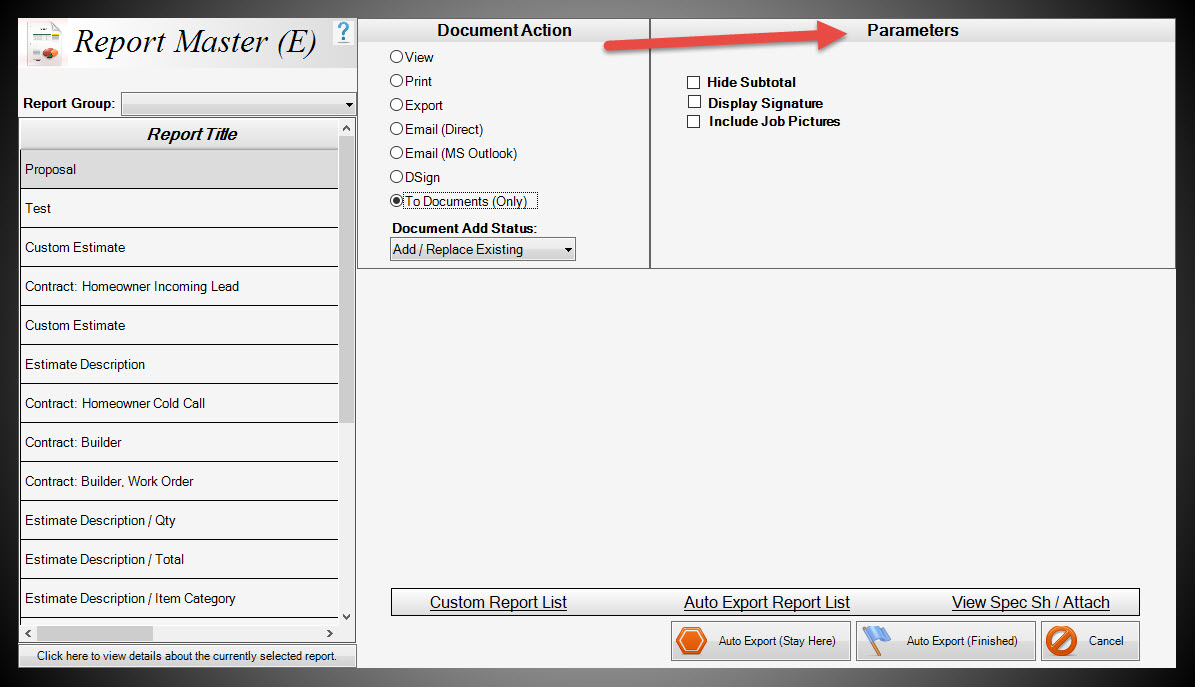
Report Parameters
Report parameters, located in the upper right of the Report Master (E) dialogue, and allow users to configure additional options specific to the type of report (Report Group) the user is working with. If the Document Action has configurable options, the parameters section will appear directly below them.
Estimate and Invoice Parameters
- Hide Subtotal – Checking this box will suppress the Subtotal line on the Estimate and Invoice reports.
- Display Signature – Checking this box will display the Sales Rep Signature on the Estimate or Invoice, if one has been imported in User Preferences
- Include Job Pictures (Allpro Insulator V14 and newer) – Checking this box will add assigned pictures from Job Pictures – Online. For more help with Job Pictures – Online click Here.
Job Sheet Parameters
- Remove Crew Filter – Checking this box will remove any Crew based filters specified on the Estimate form.
- Remove Package ID Filter – Checking this box will remove any Package ID based filtering specified on the Estimate form.
- Include Job Pictures – Checking this box will add assigned pictures from Job Pictures – Online. For more help with Job Pictures – Online click Here.
- Crew Filter – This dropdown menu allows users to filter the Job Sheet to items associated with a specific crew, even if Crew based filtering was not specified on the Estimate form.
Costing Sheet Parameters
- Include Misc Costing – Checking this box will include entries from the Miscellaneous Items tab of the Job Costing form on the Costing Sheet report.
Other Functions on Report Master (E)
Several general functions are also accessible on the Report Master dialogue, and are located at the bottom of the Report Master form.

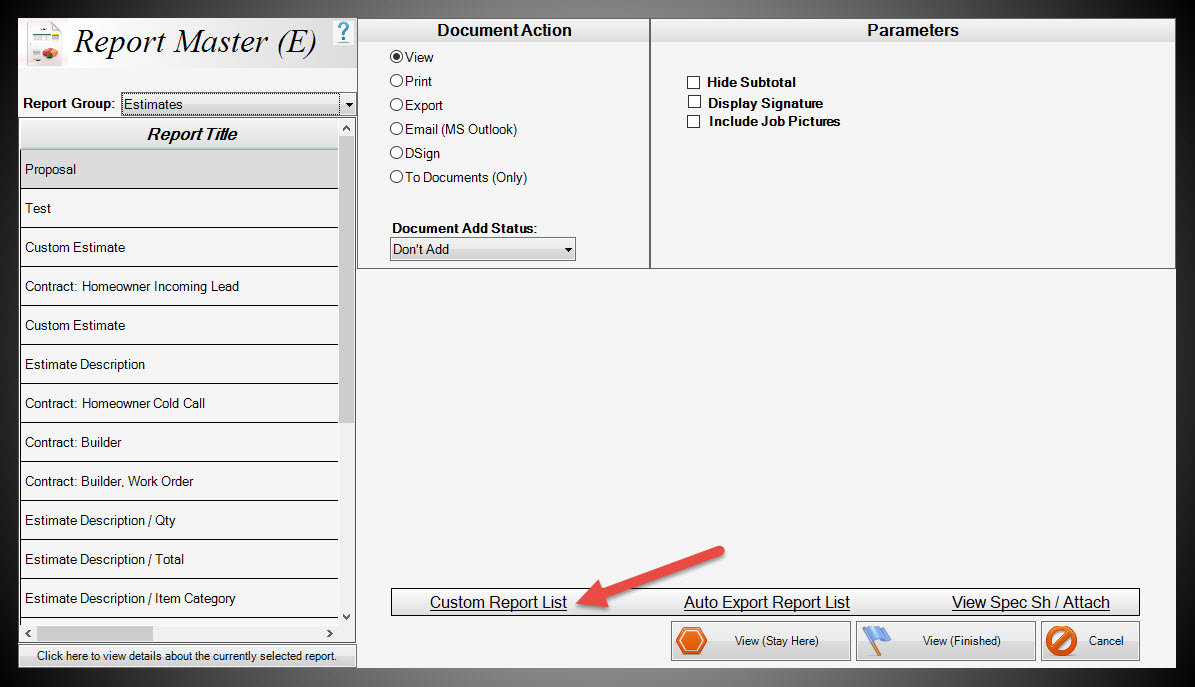
Custom Report List/User Report List
The User Report List, labelled Custom Report List in Report Master (E), allows users to create a custom list of frequently accessed reports from Report Master (E), removing the need to navigate between different report menus. Users can select reports from Estimate, Invoice, Job Sheet, and Costing Sheet report lists, then add them to the centralized User Report List. Once selected, the User Report List can be accessed from the Estimate form Print menu, Report Master (E), or the Launch Menu found on the Estimate List, Package List, Line Item List, Scheduled Jobs, DSignature List, and Scheduled Email Messages form.
Configuring the User Report List
When users first access the User Report List, it will not contain any entries. To add entries to the list, start by clicking “Custom Report List” to open the Create/Edit User Report List menu in the Print Master, pictured below.

Next, user will need to click “Select Report” to Add text, which will open a list of available reports on the left side of the Report Master Dialogue. Users can then check the checkbox next to the title of the report or reports they wish to add to the User Report List. When the desired reports have been selected, clicking “Add Reports” will add the selected reports to the User Report List.
The Process to remove reports from the User Report List is similar to the process of adding them, and users will start by clicking “Custom Report List” to open the Create/Edit User List menu. Next, they will need to click “Select Reports to Remove”, which will display a checkbox next to the title of each report in the User Report List. Check the checkbox next to the report or reports to be removed, then click “Remove Reports” to remove them from the User Report List.
Utilizing the User Report List
To use the User Report List to produce reports, open the Report Master (E) dialogue from a Estimate form Print menu or a Launch Menu from the Estimate List, Package List, Line Item List, Scheduled Jobs, DSignature List, or Scheduled Email Messages form.

From the Estimate form, the current Estimate will be used as the basis for the reports produced. When opened from a Launch Menu, the Estimate associated with the entry from which the Launch Menu was opened will be used as the basis for the reports. From the User Report List in Report Master (E), the just needs to select the desired report and Document Action then proceed as usual to view, print, export, or email the report.
Auto Export Report List
Allows the user to manage a list of reports for automatic export to the Documents table. For details on the Auto Export Report List, click Here.
View Spec Sh / Attach
Allows the user to view and select Product Spec Sheets to include with the selected report.