Email Drafts
The Email Drafts Form is part of the Advanced Features Module and allows users to create and send automated/prompted emails based on specific triggers within Allpro Insulator. The emails can be created and sent to the Customer, Job, Sales Rep, User or any number of additionally entered email addresses. The emails can be sent from the Sales Rep, User – Associated with a Sales Rep or an entered Email Account.
Creating an Email Account in Allpro Insulator
To create an email account, click on the Email Account Tab on the Email Drafts Form. It should also be noted that, to send from a Sales Rep or User, the appropriate email settings must be completed in the User Preferences form for any Sales Rep or User that will be sending Emails with this feature.
When creating an email account, make sure the Email Display Name field is filled in, this determines the name that will show up to the recipient of the email. All email account information must be entered in order to successfully create an email account. For more information regarding the setting up of email for use with Allpro Insulator and provider email settings, please click here.
Creating Email Drafts
By default Allpro Insulator, Email Drafts, comes with “Original” triggers that can be copied to create custom triggers for your use. The Drafts that are marked “Original” can not be deleted, but can be modified to suit your specific needs. To create an Email Draft, simply press the CD or copy down button on the left side of the records to create a duplicate Email Draft and then modify to your specific needs.
Each field has a specific purpose, here is a description of each field on the form, to assist with the creation of Email Drafts:

- Trigger: This field displays what will trigger the specific draft to be in use. For example – a trigger that is named “Job Scheduled” will be triggered when the job is scheduled from the Estimates Form or Schedule Pro and a trigger named Report Master E, will be triggered from the Report Master on the Estimates Form. *Not Editable
- Template: This denotes a more specific marker for each Trigger. For example, you can have a Job Scheduled trigger and a Job Scheduled trigger, but only when a specific resource is selected. *Not Editable
- Draft Status: Three statuses currently exist for the drafts created in the Email Drafts Form. Prompt, Auto and Disabled can be selected to determine how a trigger will in fact, trigger. Not all Email Drafts require a trigger, for example, an Email Draft created for the Report Master E trigger, will not use the Draft Status, because it can not be automatically sent. When Auto is selected, the email will send without prompt and the status can be retrieved from the Activity Log in the Data Menu. When Prompt is selected, the Auto Email Generator Form will open to guide the user through the email sending process. When disabled is selected, the Email Draft will not trigger and be disabled.
- Draft Name: The Draft Name Field allows users to specifically name each Email Draft, for better organization.
- Draft Descriptions: The Draft Description Field allows users to specifically name each Email Draft, for better organization.
- From Type: The From Type allows the creator of the Email Draft to determine whether the email is going to be sent from the User, Sales Rep or From Account. If an email is sent from an email account, the email account must be selected in the From Account field and an Email Account must be created in the Email Accounts form.
- From Account: The From Account field allows users to determine which created Email Account the email will be sent from. For more information regarding the setting up of Email Accounts, please click here.
- Send to Customer: When checked, an email will be sent to the Customer email address when the trigger is triggered.
- Send to Job: When checked, an email will be sent to the Job email address when the trigger is triggered.
- Send to Sales Rep: When checked, an email will be sent to the Sales Rep’s email address who is associated with the specific Estimate.
- Send to User: When checked, an email will be sent to the specific User that is logged into the Allpro Insulator at the time the email is sent.
- Send to Alternates: When checked, an email will be sent to the specific, comma separated email addresses, when the trigger is triggered.
- Parameter 1 and 2: These two fields allow for triggers to be determined by information changing from one thing to another. Currently, this field is only used to select the specific resource that will be sent for a the Scheduled Job trigger and to show the specific Sales Rep for the Report Master E triggers.
You can create as many Email Drafts as you would like and have each draft trigger and send in it’s own specific way.
Setting Up an Email Draft for Use
When setting up an email draft for use, it is important to understand who you will want the email to go to and what information needs to be provided. This is important because you may not want the same email automatically going to the Customer that goes to the Job or Sales Rep. You may want a specific email going to the scheduler and any of these specific scenarios would require a separate Email Draft.
Once an email draft record is created, you can edit the Email Subject and Body to meet your specific needs as shown below:

During this process you can change the view by selecting the “Displayed View” bullet point, which will show the email body as it will be represented in the email, including any HTML additions. An example is shown below:

As part of the Email Drafts feature, custom HTML can be added to any email body. The HTML can include images, a custom signature or specific HTML coding. For more information on the inserting of HTML into the Email Draft, click here.
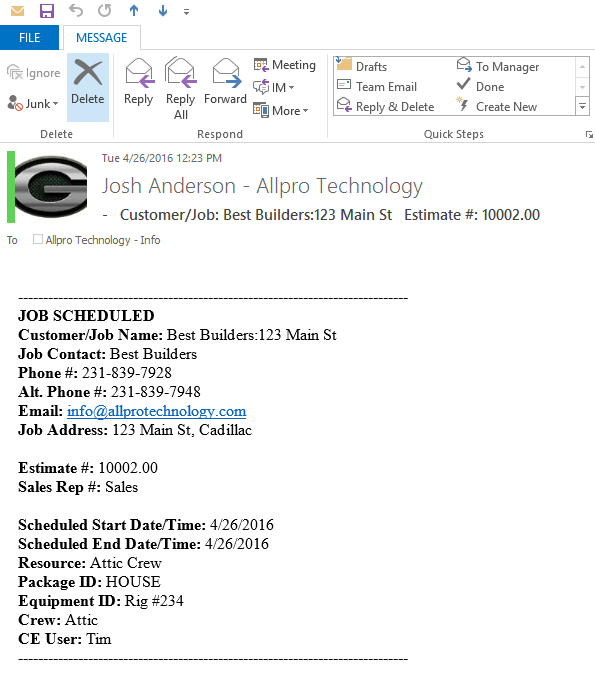
Any of the Job Scheduled or Rescheduled triggers include already created custom email subject and body as shown below:
Report Master E Trigger & Custom Email Drafts
The Report Master E is the report dialogue that allows users to view, print, export or email reports from the Estimates Form. The reports form has been modified to allow users to create custom email subjects and bodies and select them from the Report Master E dialogue. There are two types of triggers that can be created for Report Master E, one can be seen by All Sales Reps and the other can be seen by Specific Sales Reps. The list of Report Master E triggers is shown below:
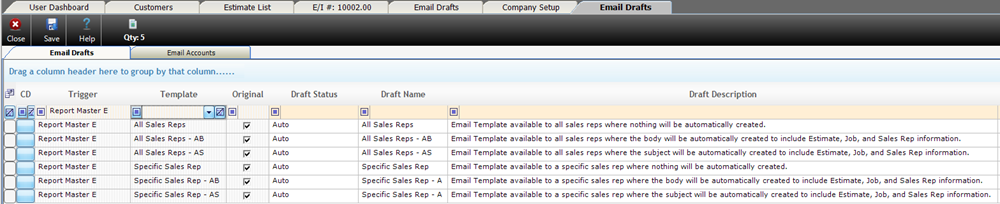
There are also three types of subject and body styles for each of the Report Master E triggers
- All Sales Rep & Specific Sales Rep Template Names: These allow for complete customizability of the subject and body of the email to be sent. The subject and body of the email does not contain any pre-defined information.
- All Sales Rep – AB & Specific Sales Rep – AB Template Names: These allow for complete customizability of the subject and body of the email to be sent, however contain information relative to the Estimate, Customer and Job as shown below:

All Sales Rep – AS & Specific Sales Rep – AS Template Names: These allow for complete customizability of the subject and body of the email to be sent, however contain information relative to the Estimate, Customer and Job as shown below:
The above images a basic representations of what can be done with the Custom Subject and Body, no additional information was added to show the exact information that is pre-defined for the AS and AB custom drafts.
Creating an All Sales Rep Report Master E Trigger:
To Create an All Sales Rep Report Master E trigger, simply copy down the record using the CD button at the far left of the Email Draft record. Once the record is copied down, you can modify the body and subject of the Email Draft to suit the specific needs.
Creating a Specific Sales Rep Report Master E Trigger:
To Create a Report Master E Trigger, go the User Preferences form and click on the Custom Email Drafts link at the top of the form. Once at the form, you can simply copy down an existing trigger and modify to the current needs. When the draft is entered, the subject and body can be changed in the bottom grid.
Creating Custom HTML:
When customizing the subject, HTML can be added in order to add images or a custom email signature. For more information regarding the HTML editor, click here.
Using a Report Master E Trigger:
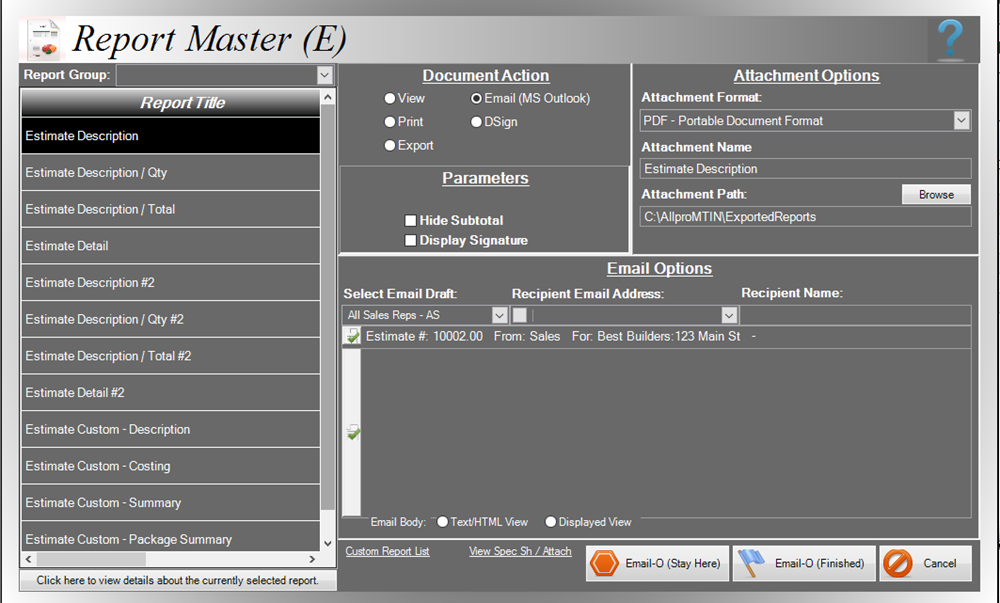
When a trigger is created from this form it will be selectable from the drop-down shown below:
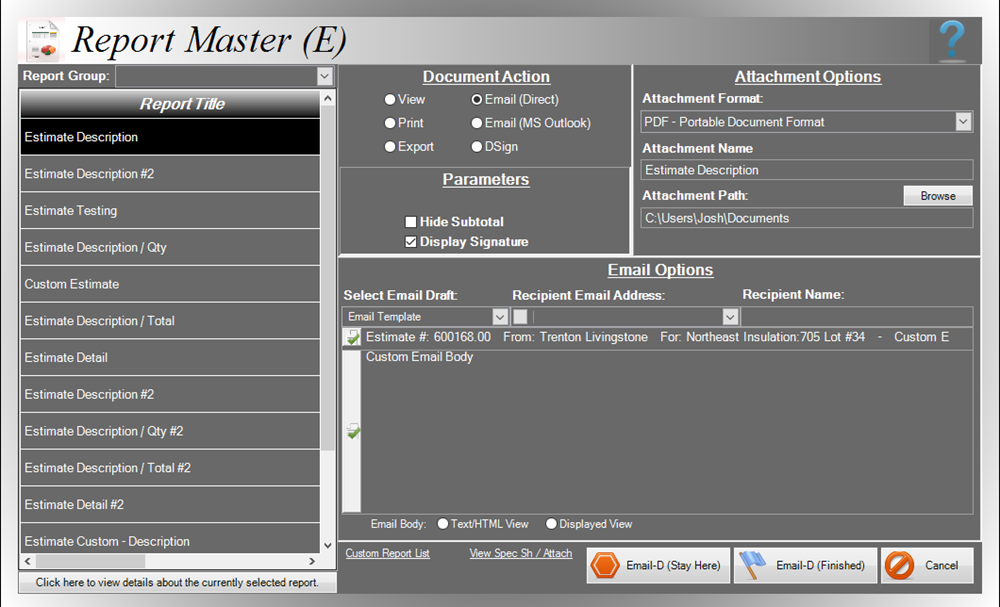
As can be seen in the above image, the Email Template was selected from the “Select Email Draft” drop-down menu and the Subject and Body automatically filled in. Two original templates will be able to be used, one will display the written subject only as it appears on the created Template and the other subject will include the Estimate #, Sales Rep and Customer/Job by default. This will allow users to include this information in the subject emails, without making it a program wide default.
The email sent in this scenario would be displayed as:
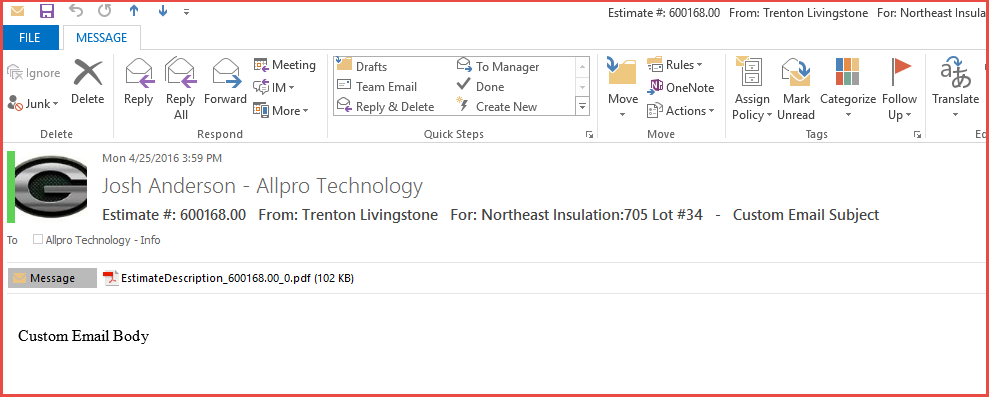
In order to use this feature, Sales Rep and User information must be correctly setup within Allpro Insulator. For more information regarding the Email Drafts feature please contact support@allprotechnology.com or call Allpro Technology at (231)839-7928.